
Want to make images translucent, giving them an ethereal look? Photoshop has a great tool to create this effect, called smoke brushes.
But how to make smoke in Photoshop? In this article, we’ll show you the process of creating smoke effects using several photoshop techniques.
Let’s get started.
How to Make Smoke in Photoshop?
Contents
You don’t need to be an expert to do this. Following the below methods, you can do the task in no time! But first, let’s learn about some approaches.
Rendering Clouds
Open your photoshop. Now, make a new, massive canvas with a white background. Also, ensure that your background and foreground colors are black and white.
The process, in short:
Make a New Layer, then choose Filter > Render > Clouds. To get varied textures, re-render the clouds numerous times.
Masking Clouds
Select the Elliptical Marquee tool and increase the Feather to 30 pixels. The size of the canvas will determine the precise amount.
Then, using a thick, soft, rounded brush, we’ll cover the borders of the created clouds. The edge must be extremely soft but uneven.
Lowering the flow of the brush to 20% or less will ensure that your lines fade out beautifully and offer you greater control over the pattern of the smoke.
Adjusting brightness and contrast
When we’re satisfied with the shape of the brush, we can change the brightness and contrast of the smoke layer.
Increasing the contrast improves the clarity of the smoke while darkening the cloud enhances the density. You can achieve the opposite effect by lightening the smoke and decreasing the contrast.
Cropping the canvas
The brush will then be completed by cropping any surplus canvas with the Crop tool. Don’t overcrop and sever your smoke base. The crop does not have to be precise, and keeping a tiny white trim is perfect.
Saving and exporting the brush
Similarly, go to Edit > Define Brush Preset to make a new brush base. I recommend labeling your brushes based on whether or not they are static. Ie. ” Cloud-Static” or “Cloud-Dynamic.”
Process of Making Smoke Using Smoke Brushes in Photoshop
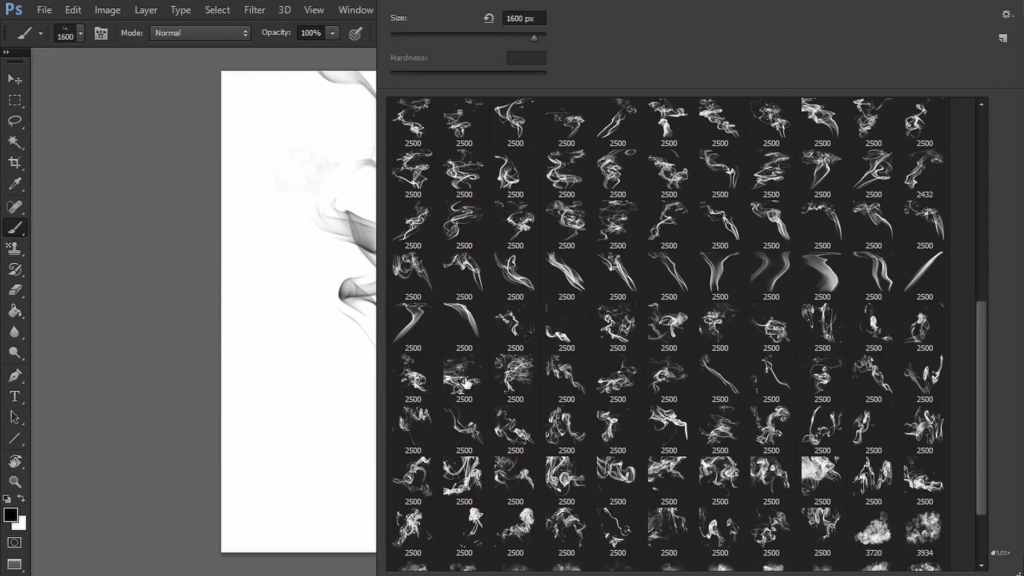
Special smoke brushes are required to create a realistic smoke effect. You’ll also need an image to work with.
Here are the resources I’ll be utilizing here:
- Man portrait
- Smoke brush set
- Smoke clouds brush set
Let’s start working step by step.
Step 1
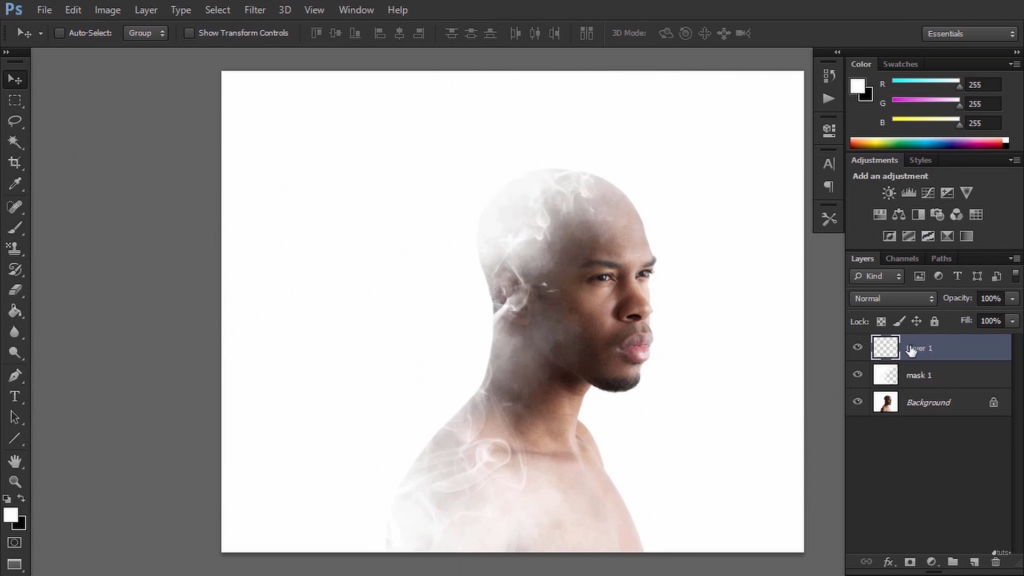
Open your document. We need to arrange the masks before we begin filming the activity.
Make a new layer called Mask 1. Draw white smoke on the object’s back with the smoke brushes, gradually merging it into the background.
There is no proper way to do this, so feel free to explore.
Step 2
Make a new layer called Mask 2. Use those smoke brushes once more, but now use black paint. Include smoke emanating from the object’s back, with all the fringes pointing in a similar general direction.
The issue with stamp brushes is that it’s impossible to rotate them. However, if you try rotating the canvas, the effects will remain the same!
To mix the smoke with the background, use a gentle eraser or a Layer Mask.
Step 3
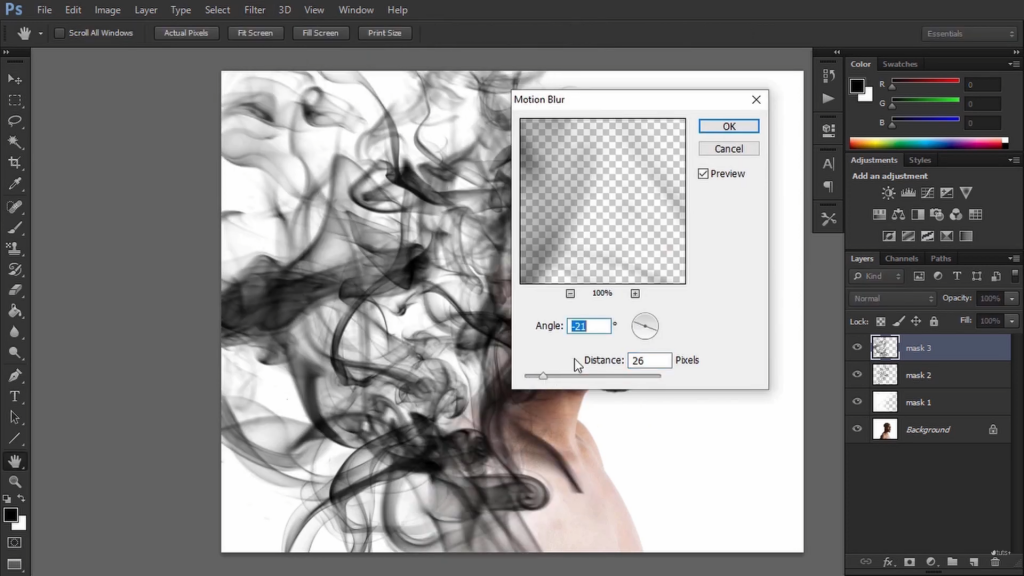
Make a new layer called Mask 3. Paint in black again, this time with some background smoke.
Then select Filter > Blur > Motion Blur from the menu. Reduce the Opacity and add some blur.
Step 4
Make a new layer naming Mask 4. Paint black smoke clouds that go in the same direction, like the one you did earlier.
Step 5
Combine Mask 2 and Mask 3.
Step 6
We can get started right away. Start a new action in the Actions panel.
Rename it the Smoke Effect. Remove all of the masks.
Step 7
Control-J again to duplicate the background layer. To pick Mask 1, select the upper copy, press Control, and click the thumbnail.
Control-Shift-I upturn the selection and then apply a Layer Mask.
Step 8
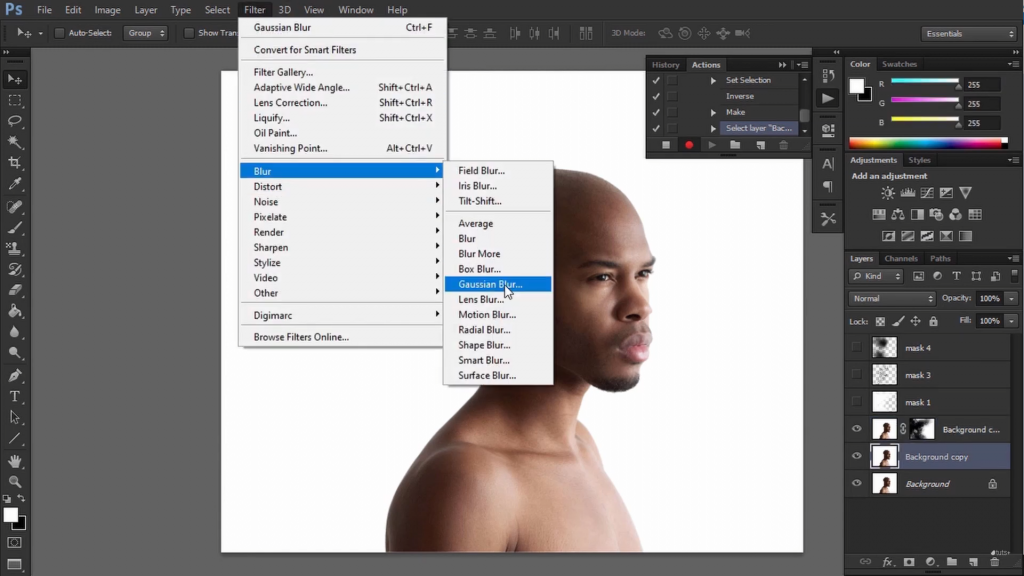
Go to Filter > Blur > Gaussian Blur on the lower copy. A basic smoke effect should be apparent by now.
Step 9
Copy the background once more and drag it to the upper edge. Apply a Gaussian Blur on it.
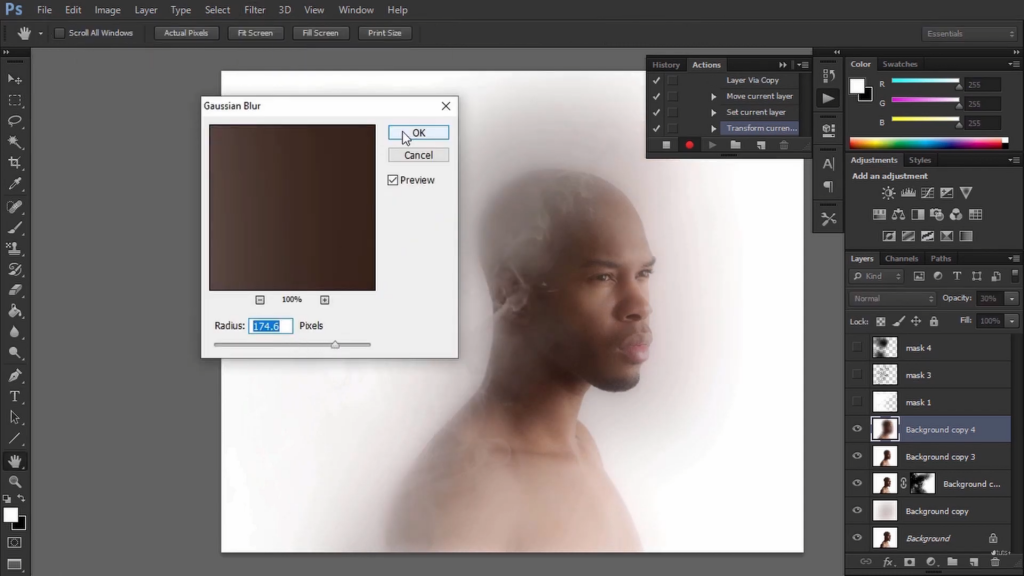
Step 10
Reduce the Opacity for a dreamy glow effect.
Step 11
Copy the background layer and drag it to the top of the page. Reduce the Opacity. To change the size of the layer, use Control-T.
Select Maintain Aspect Ratio in the upper bar and adjust the Width to 150%.
Then, drag the layer 100 pixels to the left in Relative Positioning. Enter the code twice.
Step 12
To the layer, apply Gaussian Blur. Then, apply the pick from Mask 4 as a Layer Mask without reversing.
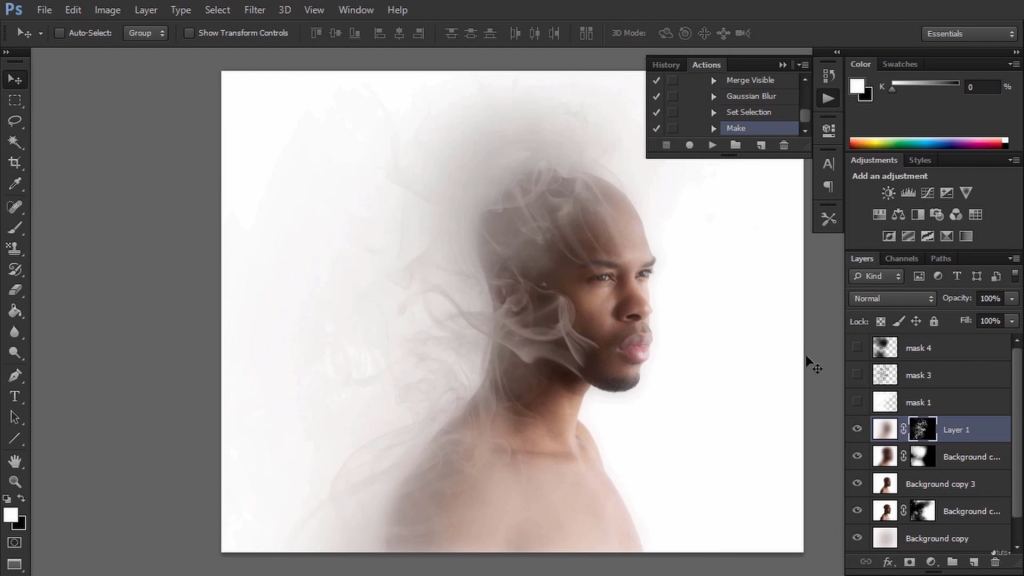
Step 13
Control-Shift-Alt-E will take a snapshot of the entire image. Apply a Gaussian Blur on it. Then, add the pick first from the middle mask as a Layer Mask. Then stop recording.
You can now apply smoke to any image you want. Simply add all of the masks and hit play!
Special Tips: When creating a smoke effect in Photoshop, use a low-opacity brush to keep the effect inconspicuous. The smoke will appear unnatural and out of place if the brush is set to a high opacity.
Check this video:
Final Words
That’s how you make a Photoshop smoke brush! You can vary the impact of a brush simply by setting the Brush parameters; no need to develop a new shape or search for multiple smoke images.
You may save numerous smoke brushes to create your customized brush package that you can instantly access whenever an image requires an extra dose of drama or mystery.
Remember that smoke brushes can create dust, fog, or even clouds! Next time you need a smoky overlay, try making it yourself and then see how simple it is.


