
Gradients are the smooth change in color or tint across an image or layer. And what’s the best part is just by layering and blending gradients, one can easily add and produce subtle color changes and other interesting effects to photos.
But how to make a gradient in photoshop? Is it hard? Can I do it all by myself?
Well, we have got all the answers ready for you. Don’t worry; the steps are pretty easy, and you can do it yourself. You need to know and follow them accordingly, as discussed below.
How to Make a Gradient in Photoshop? [Step by Step Method]
Contents
Here is a breakdown of the simplest and most effective steps for creating a smooth gradient in Photoshop like never before:
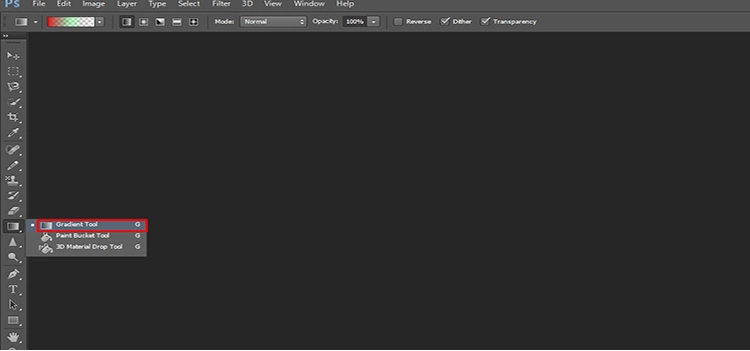
Step 1: Choose the gradient tool from the toolbar
A square icon with a gray gradient serves as the gradient tool’s icon. If the gradient tool isn’t visible, right-click the icon and hold the button down until the menu appears. After then, from the drop-down option, click on the Gradient Tool.
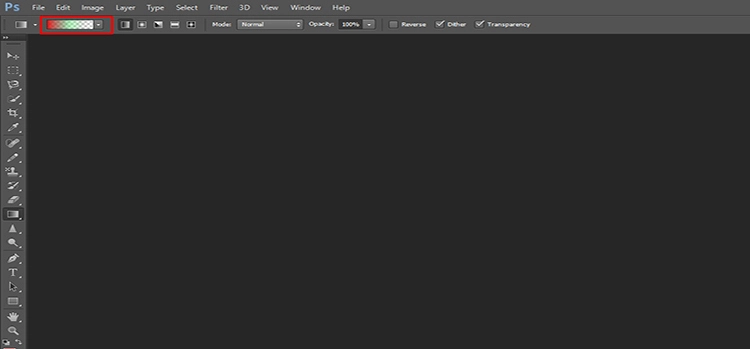
Step 2: Open the Gradient Editor
A variety of gradient tools will be opened at the top menubar once the gradient tool has been selected. To open the Gradient Editor, click the wide gradient tool at the top.
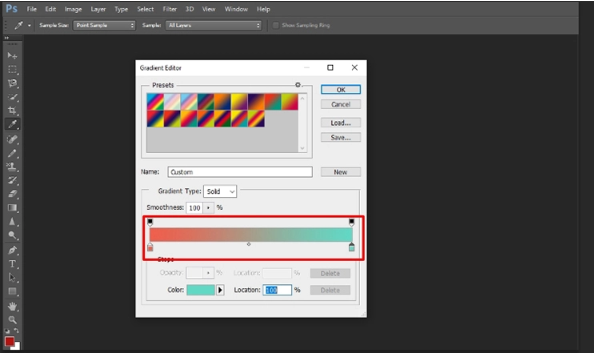
Step 3: Choose a preset
Once you open the gradient editor, several presets will appear grouped by their respective color and type. Here, you can change any settings per your preferences or use it exactly as it is.
However, the gradient bar below will display a preview if you choose a preset. If you wish to make numerous adjustments, consider beginning with a gradient from the top-level “Basics” folder.

Step 4: Choose and modify the gradient’s colors
You can see a square at the top and bottom of the gradient preview. Here, the square sliders at the bottom are known as color stops, and the square sliders at the top are known as opacity stops.
Here’s how to add and modify color using stops:
- Select a color from the “Color” drop-down menu after clicking the stop in the bottom left corner.
- Pick a new color by clicking the stop button in the bottom right. Besides, double-clicking on both of the bottom squares will allow you to choose a different color.
- Drag the stops till the gradient colors take on the desired appearance you want them to be.
- Another stop will appear in the center area. With the help of this, you can adjust the location of where you want to get the colors combined. Keep dragging the stop until it gives the required result.
- For choosing a new color, at first, click below the gradient where you want to add color. After then, choose the color. To delete a stop, select it and hit “Delete.”
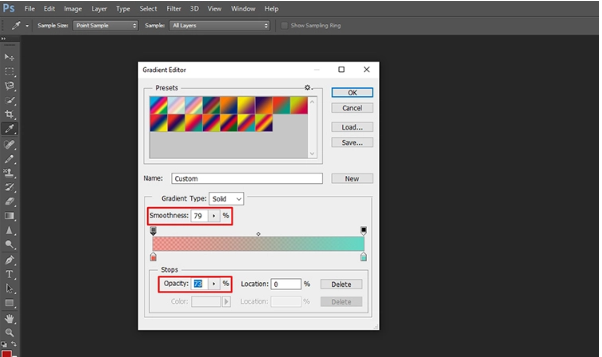
Step 5: Adjusting the gradient’s opacity and smoothness
The opacity stops in the upper two corners change the opacity. You can regulate how opaque or transparent the color is in a specific location. Besides, you can use the “Smoothness” menu to modify the gradient’s smoothness from one color transitions into another.
- In case you like a rougher gradient, simply choose Noise from the “Gradient type” menu. After then, using the “Roughness” slider, you can regulate the Noise level as per your need.
- A “rough” gradient chooses colors at random that are similar in value to your two end colors for each area. As a result, instead of a single, seamless transition, the end effect resembles a bookshelf since space is allocated for each color.
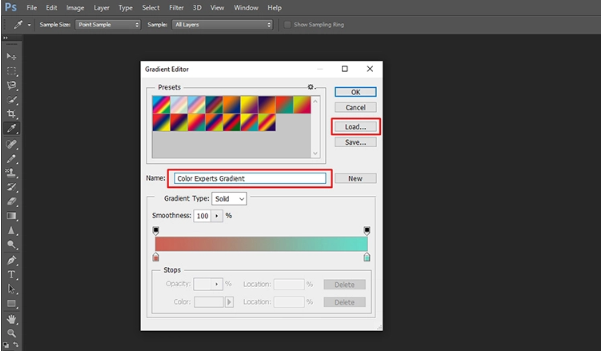
Step 6: Save the gradient
Once you are done creating a gradient as per your liking, make sure to save it right away. After all, you will not if all your hard work goes to nothing.
Here’s to how to do it:
- Type in a name in the “Name” box for your gradient.
- To include it in the current folder under “Presets,” click on the New button.
- Click Ok to finish closing down the gradient editor. Finally, your gradient is ready to be applied to an image or layer.
Bonus Tips:
- What to do if the folder where the gradient was saved isn’t appropriate? No worries, you can simply drag the gradient to a different location and save it.
- Can I create a brand new group? Of course, choose the New Gradient Group from the context menu by right-clicking anywhere on the presets list.
Congratulations! You have successfully completed it!
You may also read: How to Invert Colors in Photoshop?
Now that you know how to make a gradient in Photoshop, feel free to use these methods in your upcoming work to give it a perfect polished look.
See, it just takes a few easy steps to create one. Super easy-peasy.
However, we advise you to practice more and do some in-depth research to understand more complex gradients. After all, practice is what makes a man perfect.
Checkout this video:
Frequently Asked Questions
Check out the below queries relevant to the gradient in Photoshop:
What is an image gradient?
The direction in which the intensity or color of a picture changes is known as an image gradient. One of the basic and essential building components of image processing is undoubtedly the gradient of the image. For instance, the Canny edge detector uses an image gradient to detect edges.
What is meant by gradient filter?
A gradient filter is a type of filter that modifies its spectral characteristics along a single dimension. A spectral curve is shifted in the wavelength domain for each physical point along a one-dimensional line.
What does a color gradient mean?
A gradual transition from one color to another is referred to as a color gradient or color transition. This blending can take place between colors of the same tone (for example, light blue and navy blue), in between shades of two different tones (for example, blue and yellow), or even between more than two colors (from blue to purple to red to orange)
What are the five different types of gradients that Photoshop offers?
Photoshop’s five primary gradient types are linear, radial, angle, reflected, and diamond. Additionally, you can alter the gradient’s color, opacity, and 28 other options to choose from, such as Diffusion, Multiply, Screen, Color Burn, etc.
What happens when a gradient is applied to a sky image with a Photoshop filter?
An external filter called a neutral density gradient filter can darken the sky in a landscape shot as the photo is being captured. This, in return, results in a more evenly exposed landscape scene by ensuring it prevents the sky from being overexposed, losing its original color, and becoming flat.


