
Wondering whether you can make vector images in Photoshop? Of course, you can! Photoshop is surprisingly capable of doing so.
Adobe Photoshop can draw vector images using a few tools. Whether you are skilled or not, you can quickly create shapes and paths from scratch. This guide will tell you how to make a vector image in Photoshop in a few steps.
What are Vector Images?
Contents

Vector images are computer-generated images that include lines, points, and curves. These curves and lines are created by mathematical equations, not pixels. Simply put, it’s a 2D image that is mainly used in graphic design.
Usually, vector images include bold, striking colors such as icons, logos, and printed graphics. Vector images can be resized considerably, and the size of these files is too small.
Raster Images vs. Vector Images
Raster images, also called bitmaps, are polygonal images drawn pixel by pixel. These use small rectangular pixels and support a large number of details. Hence, the file size is large. You can’t expand the raster images without losing their quality.
While you resize or scale a raster image, it will become blurry. Where raster images involve pixels, vector images include paths. The paths make it easier to scale and edit a vector image. You can resize or scale it without losing its quality.
Can You Make Vector Images in Photoshop?
So, can you make a vector in Photoshop? Yes, you can create a vector graphic in Photoshop with shape tools. You can easily create shapes by using the Curvature tool and pen tool in Photoshop. It allows you to draw vector graphics with lines, shapes, and texts.
A vector image contains multiple objects where each object is a line or shape. A path defines the edge of an object. The path is displayed as a thin blue line in Photoshop.
Two types of color can be applied to each object.
- Stroke – it’s a pen used to draw a line that follows the path. You can set the thickness of the line in pixels and the style.
- Fill – it adds color to the space enclosed by the path.
How to Vectorize an Image in Photoshop?
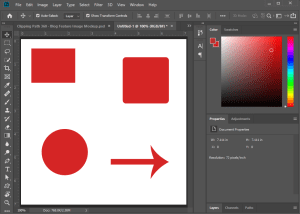
There are several tools in Photoshop with which you can draw many common shapes. For example;
- Rectangular tool (Default)
- Ellipse tool
- Round, rectangular tool
- Line tool
- Polygon tool
- Custom shape tool
The rectangular tool is the default.
- Click and hold on to the Icon Tool or right-click on the icon to view additional tools.
- You can select the highlighted rectangular tool by pressing U or pressing Shift + U to rotate through the tools.
To draw basic vector shapes:
- Choose the tool first for the shape
- Add strokes and fill colors
- Click the stroke and drag it into your canvas. The shape follows the direction you are dragging.
If you want to draw an identical shape, like a square or circle, click and hold down the Shift key. The shift key will force the rectangular tool to create a perfect circle or square.
If you want to draw a triangle, use the Polygon Tool instead.
Open the Create Polygon setting box with a single click on the canvas. For a triangle, select 3 Number of Sides.
Draw Vector Lines
- Select the Line Tool in the options bar.
- Set the Height to set the thickness of the line.
- Then click on the canvas and draw your line by holding down the Shift key.
Draw Vector Shapes
- Choose the Custom Shape Tool and set the stroke and fill colors.
- Now click on the Shape option.
- If you want to add more shapes, click Settings and select a category.
- You can add arrows, icons, speech bubbles, textures, etc.
- Click and drag the shape to add it to your image.
Read More: How to Convert a Photo to Line Drawing?
How to Edit and Modify Vectorize Images?

When you create a vector graphic in Photoshop, you don’t just have to be limited to basic shapes. In Photoshop, you can modify them very quickly. So how to do it?
First, choose the shape you want to modify. Then, this will highlight the shape. It will make the anchor points along its path visible. The shapes have curves or corners along with these anchor points.
- Select the Direct Selection Tool or press Shift+A.
- Click and drag the anchor points to any direct to modify the previous shape. You can also drag two or more points at a time for advanced edits.
- Click on the anchor points by holding the Shift key.
- Move them at the same time using the Cursor Keys.
Read Also: How to Edit Multiple Photos on Instagram After Posting
Merge and Combine Vector Shapes
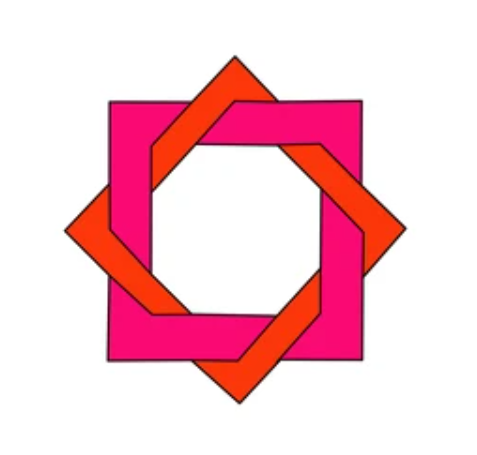
Path Operations may be used to create even more complicated forms. You may use this to merge numerous forms into a single new one.
Begin by sketching a form on the canvas. Then, under the options bar at the top of the screen, select Path Operations. Every new route or form is usually placed on its own layer. By clicking Combine Shapes, you may change this.
Now make a new form. The second form will be placed on the same layer as the first. Use the Path Selection Tool when you need to move particular items.
Drag the second form over the first to overlap it. Although they remain separate objects, the two combine into a single form. In Path Operations, click Merge Shape Components to merge them into a single object.
Select the second form you drew using the Path Selection Tool. Subtract Front Shape is now available in Path Operations. The form, as well as the region where it overlaps with the first shape, is eliminated.
Both forms are highlighted. Select Intersect Shape Areas from Path Operations. Apart from the locations where they overlap, both forms are removed. This option is being used to make a semi-circle.
Finally, select Exclude Overlapping Shapes after highlighting both shapes. This eliminates the overlapped region between the two forms while leaving the rest intact.
These tools are useful for creating new forms or splitting or cutting portions from existing ones. They’re also compatible with the Pen Tool and Text.
Read Also: How to Unmerge Layers in Photoshop?
Conclusion
So, can you make vector images in Photoshop? We hope that you got the answer. There are specific tools in Photoshop to create your own piece of vector image. Although Adobe Photoshop is not the best solution for professional graphic design, it is amazingly effective.
Frequently Asked Questions
1. Can Photoshop produce vector images?
By default, Photoshop cannot produce vector files. It can only make some raster files with embedded vector data. It might be a vector square whose corners will remain crisp and sharp. However, a gradient fill can cause its edges to become flat.
2. How do I Vectorize a logo in Photoshop?
Vectorizing a logo in Photoshop is quite simple and very beginner-friendly. First, change logo resolution (the logo should be in PNG format and transparent). Then, vectorize the logo in Photoshop; here is how;
- Select your logo
- Make a work path for that logo
- Create a vector mask of that logo
- Now export the logo as SVG or EPS and save it in the same format.
3. Can you convert a raster image to a vector?
Absolutely, you can convert a raster image to a vector image. Though you cannot easily convert a raster image, you can re-create it as a vector. The raster image is too small; you can do this in Adobe Illustrator.
4. How do I turn an image into a vector?
Here is a fundamental process to turn an image into a vector.
- Select an image to convert to a vector
- Choose an image Trace Preset
- Vectorize the image with Image Trace
- Adjust your Traced image
- Ungroup or separate color shapes
- Edit the vector image and save


