
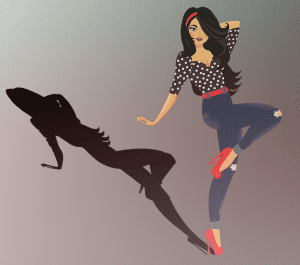
Shadow is a great phenomenon of nature. When you place an object under light or stand under light, you will notice a shadow forming. This shadow usually falls diagonally to the back of the person or object. It is dark at the nearest point to the object/person and gets blurry as it goes further from the object/person.
This particular idea becomes a Photoshop effect when Photoshop translates it into a graphical presentation named after cast shadow.
This article will tell you how to create a realistic cast shadow effect in Photoshop.
What is the Cast Shadow?
Contents
Due to light, when an item or person stands on any surface, they cast a shadow behind them. The person or object’s shadow is cast diagonally rearward. Furthermore, the shadow remains black at the junction point and cast at the conclusion.
This notion becomes a Photoshop effect when Photoshop translates it into a graphical presentation, and the effect is named after cast shadow.
Any image with cast shadow has a more realistic feel to it. Especially if you’re going to remove the background.
Furthermore, the cast shadow is distinct from other Photoshop graphical shadow effects. We can only add cast shadow to an item when it is contacted with any surface, according to its origin. As a result, we can’t apply the cast shadow effect to any item that isn’t touched by the surface.
Preparing for the Cast Shadow Effect Project
Any photo with cast shadow has a more realistic feel, particularly if you’re going to remove the background. In addition, the cast shadow is distinct from other Photoshop graphical shadow effects.
According to its origin, we can only create a realistic cast shadow effect in Photoshop on an object when touched with any surface. As a result, if the surface doesn’t contact the object, we can’t use the cast shadow effect on it.
You will need to navigate a few tools throughout the process. Those tools are:
- Pen tool
- Crop tool
- Gradient tool
- Background/Foreground color swatch
- Selection tool
These tools work can mostly be found in the following photoshop versions. So, we suggest you use any of these 2 versions:
- Adobe Photoshop CC
- Adobe Photoshop CS6 or CS5
16 Steps to Create a Realistic Cast Shadow Effect in Photoshop
There are quite a few steps you will need to go through in creating a realistic cast shadow effect in photoshop. But don’t worry, we will take you through them all.
Step 1: Selecting the image object or person
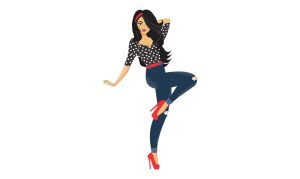
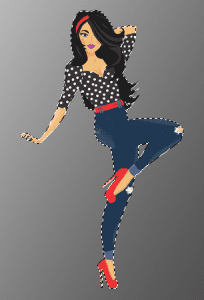
The very first step is the simplest one to start with. You will need to select the image object or person with the selection tools like Lasso, Quick Selection, or Pen Tool. Use the tools to sketch around the area to make the selection outline appear around them.
Step 2: Make a new layer from the selection
After selecting your object or person, make a new layer by pressing Ctrl + J on Windows or Command + J on Mac. Thus, you will see a new layer with the name “Layer 1” along with the background layer.
Step 3: Check if extra Canva space needed
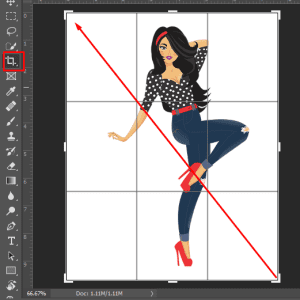
You might or might not need extra Canva space. In case you need it, you will have to use the Crop tool.
Select the tool and click on the gray area above and to the left of the top left corner. Hold down the selected area with your mouse and drag the area downwards until the bottom right corner.
After releasing the mouse button, you will notice a crop border area with little squares. Accept the crop area by pressing Enter for Windows or Return for Mac.
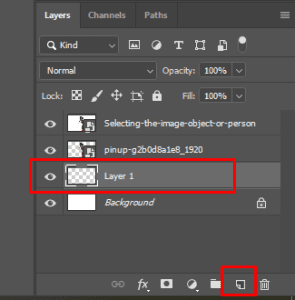
Step 4: Add an extra blank layer
At the lower area of the Layers panel, you will find the New Layer icon. Hold the Ctrl or Command key and click on it. This will add a new blank layer below the object/person layer.
Step 5: Draw a gradient over the new blank layer
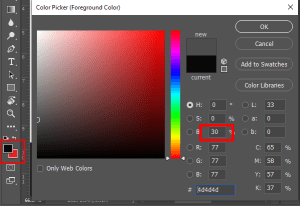
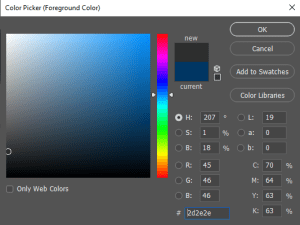
In this step, you will need to draw a new background over the new blank layer using the gradient. Click on the Foreground color swatch tool, and Photoshop will open its Color Picker. You can choose a background color from here.
Since you are drawing shadow, the best pick is a light gray color. Keep a brightness level of 70%, and then click OK.
After that, select the Gradient tool and right-click for Windows or click Control for Mac. This will quickly bring the Gradient picker up onto the screen. When you complete this, press Enter or Return.
Then, click near the document’s bottom, hold down the Shift key, and drag upwards until you’re just over the image’s horizontal center. When you drag while holding the Shift key, your movements are constrained, making vertical dragging easier.
Photoshop creates a gradient that serves as the image’s new background when you let go of the mouse button.
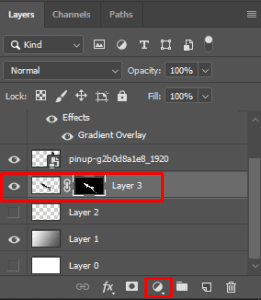
Step 6: Add an extra layer above the gradient
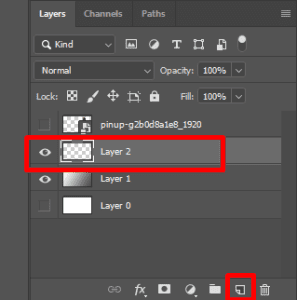
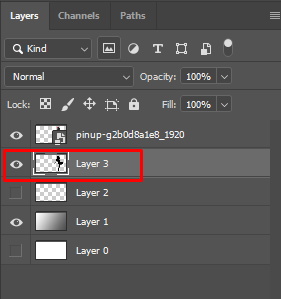
Get back to the New Layer icon again, and you will notice the Layers Panel at the bottom. Click on it, and you will see a new layer that is blank and above the gradient.
Step 7: Selection around the object or person
Hold the Ctrl or Command key and click on the preview thumbnail of the top layer. This will load a selection surrounding the layer’s content.
Step 8: Add a black fill to the selection
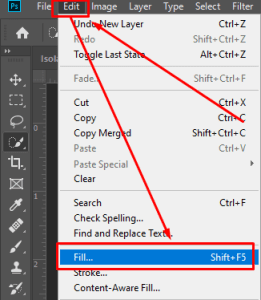
Now, go to the Edit menu. You will find it at the top portion of your screen. Click on it and select Fill. Once your Fill box appears, select black and press OK. This will add a black fill to the section.
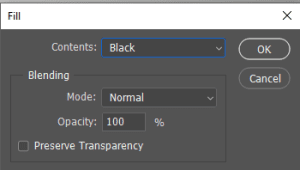
You might not immediately see it as it’s being blocked by Layer 1. But you can check it in the preview thumbnail option.
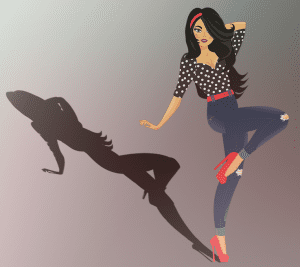
Step 9: Bring the shadow into its position
In the last step, you have filled an area with black color. This area has become the shadow area for the object/person. But the job’s not done yet.
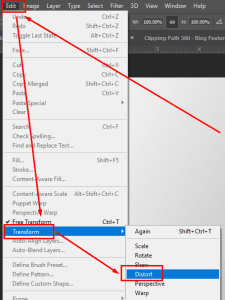
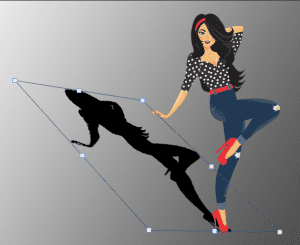
First, use the Distort Option to reshape and move the black area to the correct position. You can reshape the area by clicking on the transform handle.
Drag it downwards diagonally until the shadow starts resembling the object/person. You might also need to reshape the bottom part using the same method.
After completing, press Enter or Command and get out of the Distort Option.
Step 10: Make it slightly blurry
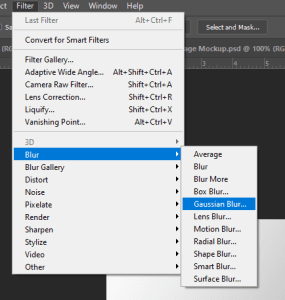
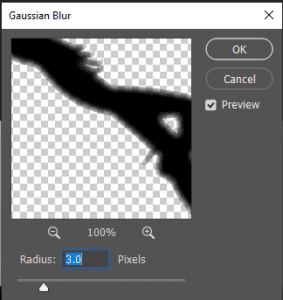
Let’s apply a subtle blur to the shadow’s edges. Choose Blur, then Gaussian Blur from the Filter option up top.
The Gaussian Blur dialogue box appears as a result of this action. To create a minor blur effect, raise the Radius to roughly 1.5 pixels, then click OK to close the dialogue box. The shadow’s edges will be softer than usual.
Step 11: Gradually select your shadow using quick mask mode
A shadow will look realistic when the edges become softer as it goes further away from the object/person. For this, go to the Gaussian Blur filter again. But before that, use the Quick Mask mode to draw a selection.
Now click the Gradient tool again and press D. This will reset and turn the Foreground and Background to default. Then switch to Quick Mask mode by pressing Q, clicking the shadow’s bottom, and dragging your mouse diagonally to the top.
After that, you will notice a Quick Mask overlay. The top transparent area is the full selection portion. And the bottom red area will not be selected.
This will bring the gradual blurry effect later on. Now, press Q and exit from the Quick Mask mode to the normal mode.
Step 12: Select Gaussian filer once again
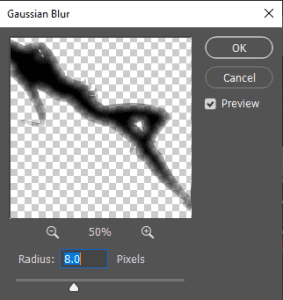
As your last-used filter was the exact one, you can make a shortcut to bring it back. All you need to do is click Ctrl + Alt + F for Windows or Command + Option + F for Mac.
You will notice a dialogue box on your screen, where you will need to raise the Radius value to 10 pixels. Then click OK and press Ctrl + D for Windows or Command + D for Mac to get rid of the selection area. Thus, the edges will start appearing gradually softer.
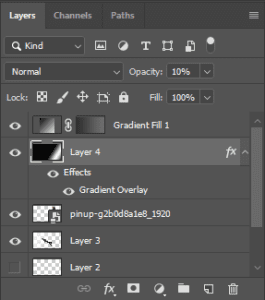
Step 13: Add A Layer Mask
A layer mask can be used to make the shadow fade out as it advances away from the subject. At the bottom of the Layers window, find the Layer Mask icon. A white-filled layer mask thumbnail will show to the right of the shadow layer preview thumbnail.
Read More: Copy a Layer Mask in Photoshop Elements
Step 14: Select dark grey as the foreground color
To prevent the shadow from completely fading, select the Background color swatch. Once the color option box appears, select dark grey with 30% brightness. Then, click OK and close the color picker.
Step 15: Draw a gradient across the shadow
Now, select the Gradient tool again and click on the bottom area of the shadow. Diagonally drag your mouse upwards and to the top corner. After doing this, release the mouse to notice the effect of shadow gradually fading on the top.
Step 16: Decrease the shadow opacity
We’re finally in the last step of the process. The only thing left to do now is to decrease the shadow opacity. This will make the shadowless dark near the object/person. The Opacity option is in the top right corner. Ideally, you should lower it to 85%. Thus, your work here is done.
Conclusion
You can make anything livelier by adding shadow to it. The cast shadow is the most realistic and deep among several different shadow types. It makes the object or person in the picture appear more natural.
But creating a realistic cast shadow in Photoshop requires patience and skill. The job is simple as long as you know your way around the software and its tools. The 16-step approach toward cast shadow creation should make your job easier.
Frequently Asked Questions
When should I use cast shadow?
You can add cast shadow to the object/person image in the following scenarios:
- Image subject long in height
- Image subject standing at a 120-degree angle
- Image subject standing in the background
- Image subject having disproportionate height and width
How can I separate cast shadows and highlights in Photoshop?
Choose Color Range under the Select menu to have Photoshop select only the shadow portions of your image. Select Shadows (or Highlights) from the Select pop-up menu when the dialogue box displays, then OK.
How do shadow highlights work in Photoshop?
Shadows/Highlights, as the name suggests, allow us to control the shadows and highlights separately in an image. As a result, we can make the darkest and lightest areas more detail-oriented. It also helps in reducing overall image contrast.
How do I create a shadow in Photoshop?
Select ‘Transform’ from the ‘Edit’ menu, then ‘Distort.’ To lower the shadow, you need to use the ‘Distort’ function. Reshape and drag the top transform handle diagonally to the left or right. (Depending on where you want to put the object/person in the image.)


