

Are you looking for a way to change up your images? Are you wanting to do something creative with an old photo? Maybe you’ve got a design project that needs some coloring. Well, there are many ways to manipulate colors, but one of the simplest is by inverting them. Inverting colors can be done in Photoshop or another graphics editing software. It’s easy enough to do, but first you need to know how! Read on for everything you need to know about inverting colors in Photoshop.
What is inverting colors?
Contents
Inverting colors is where you take an image that has been colored a certain way, and instead of coloring the image using those colors, you reverse the colors to their original state. How to Invert Colors in Photoshop To reverse a color in Photoshop, simply choose Image > RGB Color Balance and choose the same color that was previously used. It doesn’t matter if the color was white, black, or other colors. Next, click the color icon in the window at the top of your Photoshop interface.
A drop down menu will open up with several options. Choose the “New Clip” option and click “OK.” A new folder will open up on your Photoshop Desktop. On the left side of the folder is a new window with a box with a section on the left and a section on the right.
How to Invert Colors in Photoshop
To invert colors in Photoshop, you need to follow some steps. These are:
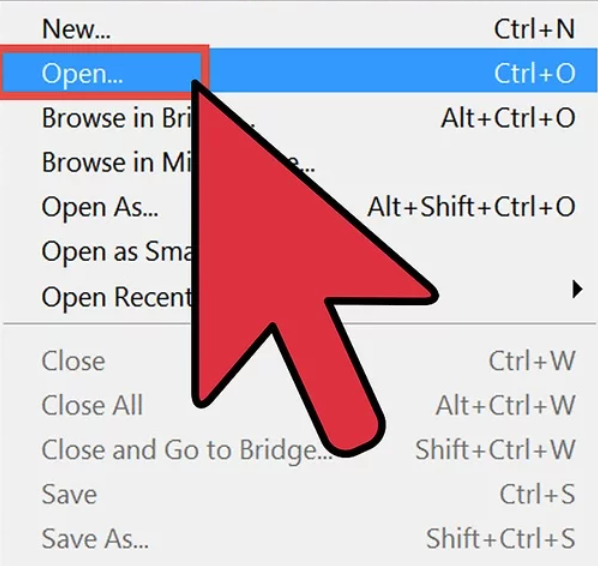
Open an image in Photoshop: Ensure the photo is suitable for color inversion. The difference is more noticeable whether the picture is dark or bright.
It is important to note that the inversion replaces every color with its inverse: the brightness of each pixel is reversed. Consider how inverting the photo will affect its power. If unsure, give it a go!
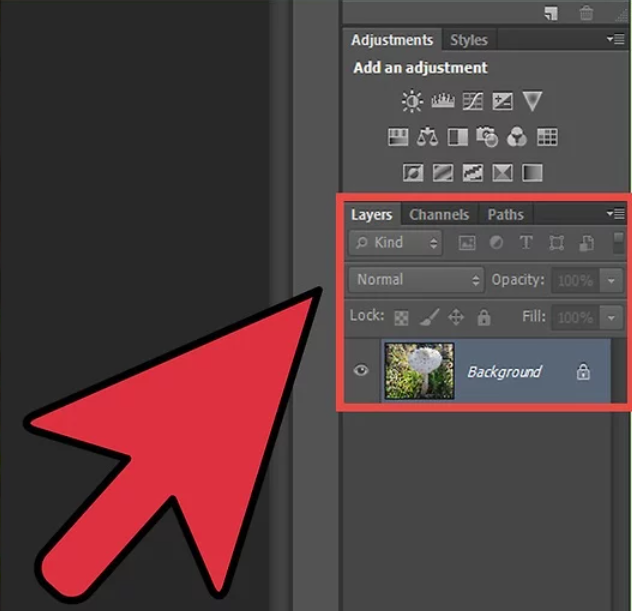
Open the Layers panel: If you can’t see the Layers panel, select “Layers” from the Window menu. Remember that you’re creating a color-inverted layer on top of the original image, not changing its colors.
- Select an area of the image to flip the colors (Marquee, Lasso, and Magic Wand). Inverting colors across the image doesn’t need an active selection.
- Reverse a complex composition by adding a new layer on top of the layer stack. Now you can merge your composite by holding Shift + Ctrl + E.
Read More: Copy a Layer Mask in Photoshop
Invert the image: In the Layers panel, click the unlabeled “Create New Fill or Adjustment Layer” button. Choose “Invert” from the drop-down. Photoshop puts a “Invert Adjustment” layer above the active layer.
If you choose before performing the adjustment, a layer mask is produced. The program inverts colors in the selected area.
Arrange the inverted layer in the required location: Move the Invert layer up or down the layer stack. The inversion’s influence on your file depends on where it is in the layer stack.
Toggle the inverted layer: Shift-click on the Invert adjustment layer mask to deactivate the mask and apply the adjustment to the whole file. To re-enable the layer mask, click it. To deactivate the adjustment, turn off the eyeball indication on the Invert layer listing.
Invert and non-invert the picture together: Then choose Create New Snapshot. Keep each image in a new tab. This way, you may deal with both images.
Also Read: How to Make a Gradient in Photoshop
But What If I Don’t Have Photoshop?
So far, I’ve explained what happens when you do an “I” symbol to an image, but how about when you don’t have Photoshop? The concept of inverting colors is pretty simple, but if you’re unable to get Photoshop, check out these tutorials: Can’t You Invert Colors in Photoshop Just by Settings? Sure, but the same thing applies.
What if you have a photo that is properly converted for printing but you still want the colors to be flipped? No problem! Some of the conversion tools are unable to convert RGB colors to CMYK color values so they can’t be inverted, but you can manually invert colors. See the easy steps for manually inverting colors here: Can’t I Just Open Image in GIMP? This is a common question, and it is the one I get asked the most.
Read Also: Difference between gimp vs lightroom
How to Invert the Colors of Multiple Images at the Same Time?
Color inversion may be applied to many photographs at once using Photoshop’s Action tool. With a few clicks, you can invert the colors of all your photographs, and you don’t have to do it for each one separately.
Here’s how to make a Photoshop action that inverts an image’s colors:
1. Create a new folder called Original Photos on your desktop.
2. Move all of the photographs to this folder that you wish to flip the colors of.
3. On your desktop, make a new folder called Inverted Photos. When you use Photoshop to invert the colors of your images, this is where you’ll store them.
4. Use Photoshop to open an image.
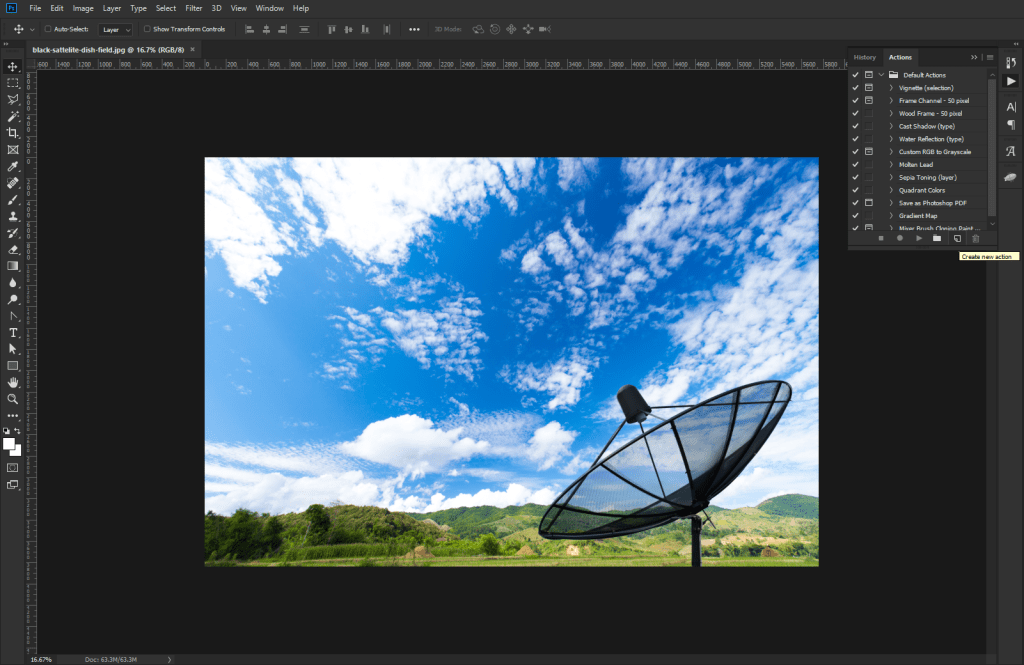
5. If the Actions panel isn’t visible, go to Window > Actions at the top to activate it.
6. To add a new action, click Add (+) in the Actions window.
7. Give your action a relevant name, such as “Invert Photo Colors.” Then press the Record button.
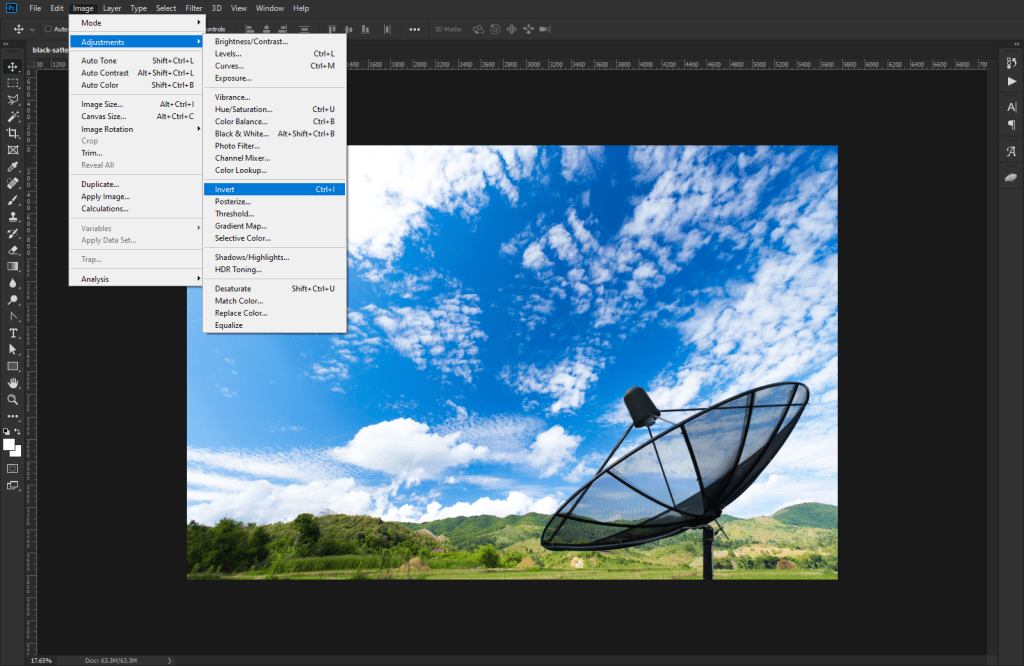
8. Select Image > Adjustments > Invert after the action recording has started.
9. Select File > Save As when the colors have been reversed.
10. Select File > Save As when the colors have been inverted.
11. Don’t fill in the name field with anything. Simply select the Inverted Photos folder you already made, and then click Save at the bottom.
12. To stop recording your action, click the Stop symbol in the Actions window.
13. In Photoshop, go to File > Automate > Batch to batch invert colors for your photos.
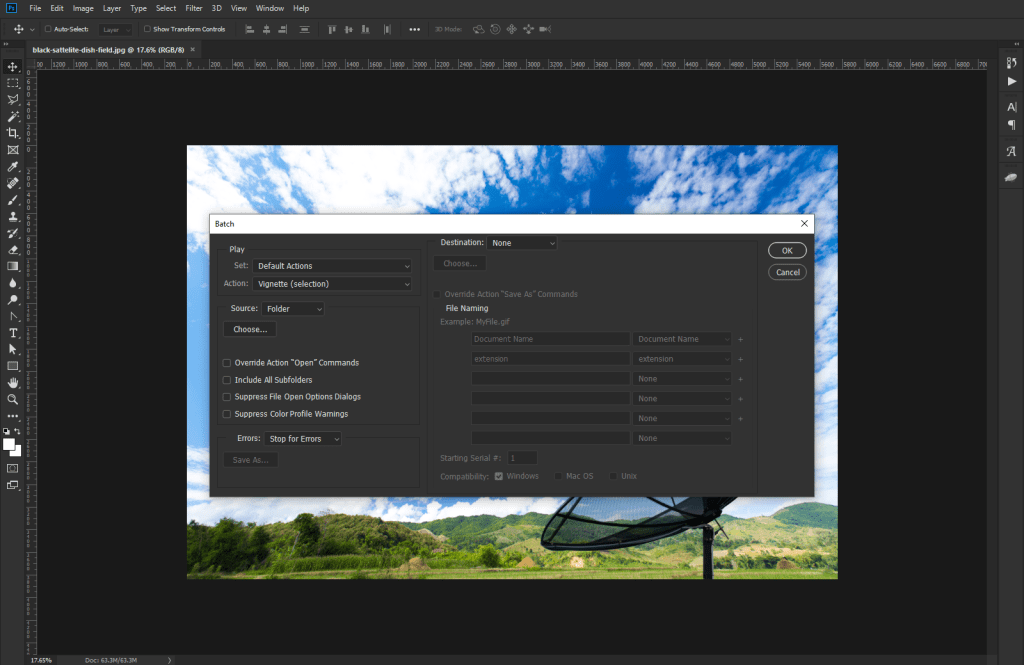
14. From the Action dropdown menu, select your newly created action.
15. From the Source menu, choose Folder.
16. Select the Original Photos folder on your desktop from the Choose menu beneath the Folder menu.
17. Click OK to have Photoshop invert the colors of all the photographs in the Original Photos folder.
Conclusion
Although the usefulness of inverting colors is apparent, you might find that there is a learning curve involved in figuring out how to do it. The basics are simple enough, though. The advantage to inverting colors is that you can use the palette of your image to achieve the desired outcome. This is especially useful when you’re working with subjects that are too dark or too light to color in in the first place.
You can use the inverted colors from the palette to bring the image back to normal. Start With an Old Photo Let’s start with a simple technique that anyone can try.
You can follow this video:


