
The beauty of a photo doesn’t lie only in the enclosures captured in it but also in how precise and naturalistic it is. So, the task of a photographer doesn’t end with the best click.
Here comes the next step—editing and retouching the image, each subject to eliminate the distractions.
Smoothing edge is one of the tasks to do so. Let’s see how to do this.
What is a Smooth Edge in the Picture?
Contents
The quality of a photo can be low by either accident or other reasons like lack of light or the limitations of the device. Like other issues, it may cause the edge of an object in the photo to be rough.
For example, you have taken a picture of the sky at night. In photography, it’s a common issue not finding the moon a smooth circle or the light radiated from it somehow doesn’t have the same glow.
What’s the matter here is – your moon’s edges are jugged, and you need to smooth them to get the natural radiance. That’s edge smoothing in photoshop.
How to Smooth Edges in Photoshop?
Working Photoshop is the combined synchronization of the human eye and some functions in the software. We call them tools, in other words.
Below are the tools you will require tool make a smooth edge of your photo in Photoshop.
- Refine Edge Brush
- Dodge tool
- Burn Tool
- Level
- Gaussian Blur
Now you know which tools to work with. Here are the steps are given below.
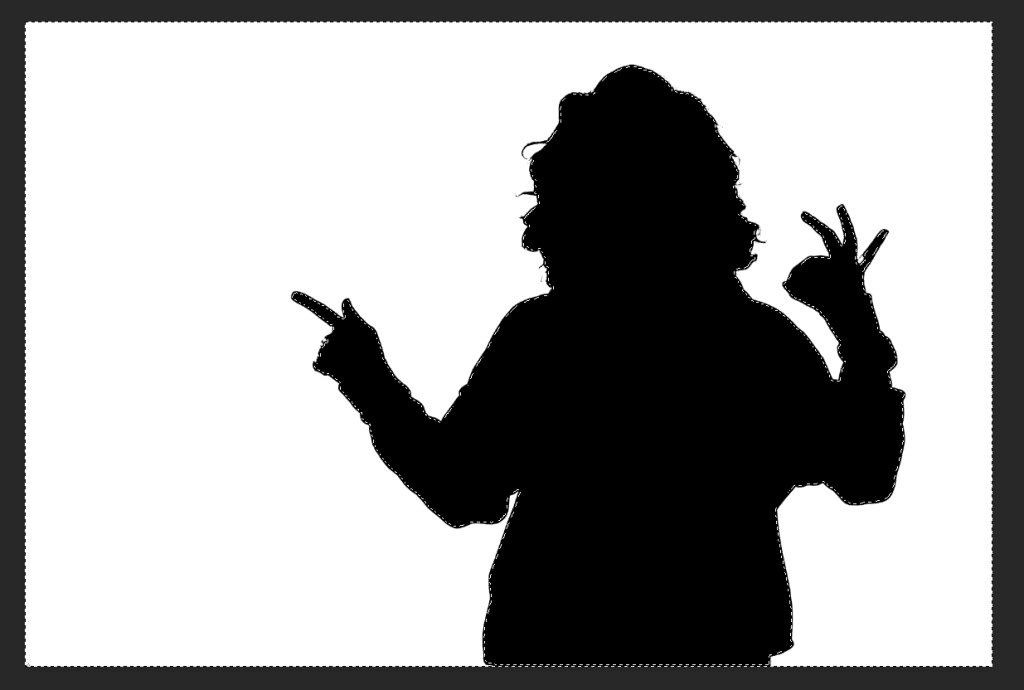
Make selection of the object
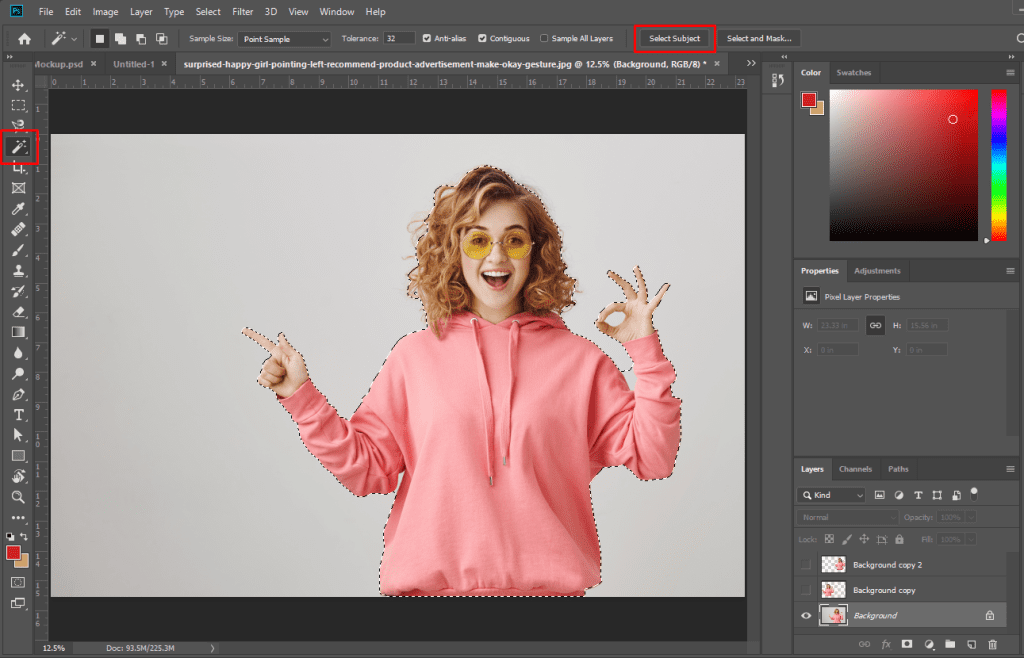
Select the object or the portion you want to smooth the edge. To do that, find the Quick Selection tool on the toolbar left in the interface.
Selection of the channels panel

Find the option <channel> on the screen’s right side. Selecting it will bring a new window. There you’ll see the photograph’s color-contrasting percentage.
You have to choose the channel where the contrast color is the highest. Let’s suppose we go for the blue channel.
Create a new channel
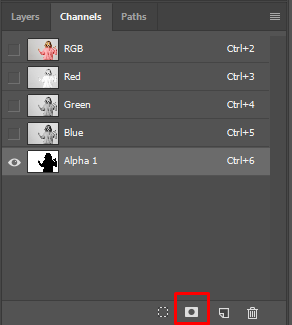
At the bottom of Photoshop, there is the new channel symbol. Drag the Blue channel to it with your mouse. The ‘+’ symbol in it helps to create a new channel.
Selection of contrast
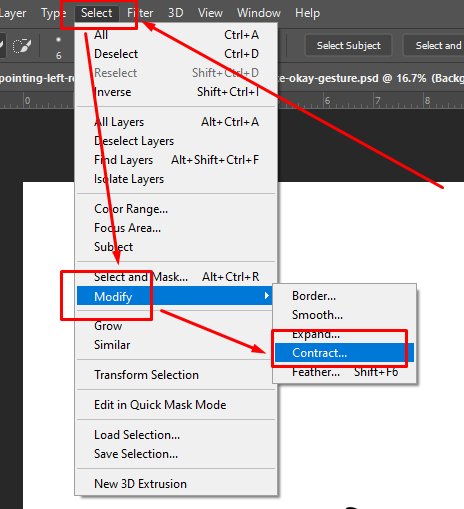
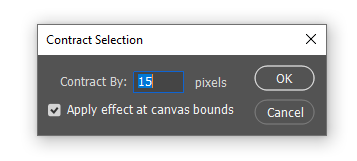
Click on Select-Modify-Contrast at the top Options bar. Enter any pixel within the range of 12-16 pixels. Then, click Ok.
Filling selection

Choose the black color to fill the selection. You can select the Foreground color in the toolbar. There is an alternative way to do that. Enter D for changing the color.
Expanding selection
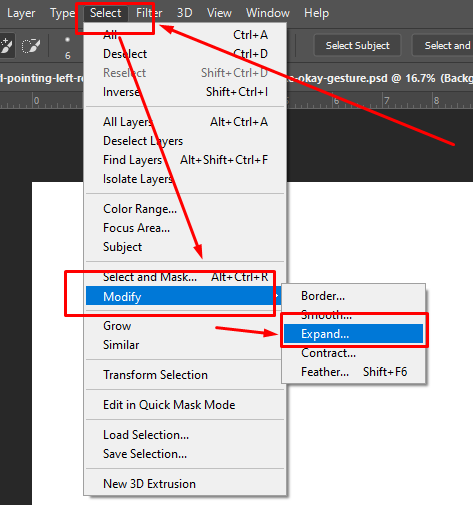
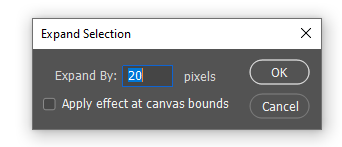
Now, click on Select-Modify from the option bar. Set the ‘Expand By’ 20-35 pixels according to the resolution of your image.
Inverse selection
At this stage, reverse the selection. To do that, follow the command below:
- Enter Cmd/Ctrl+Shift+I
Replace fill color

Now, change the fill color. It would be white this time. Press Ctrl+Cmd+Delete to change the foreground color.
Again, do the deselect of the inverse selection. Here is the command for that,
- Ctrl/Cmd+D
Your cutout is done, but the work isn’t completed yet. Do zoom on and check the edges. Yes, the edges need to be fixed.
Detect the edges
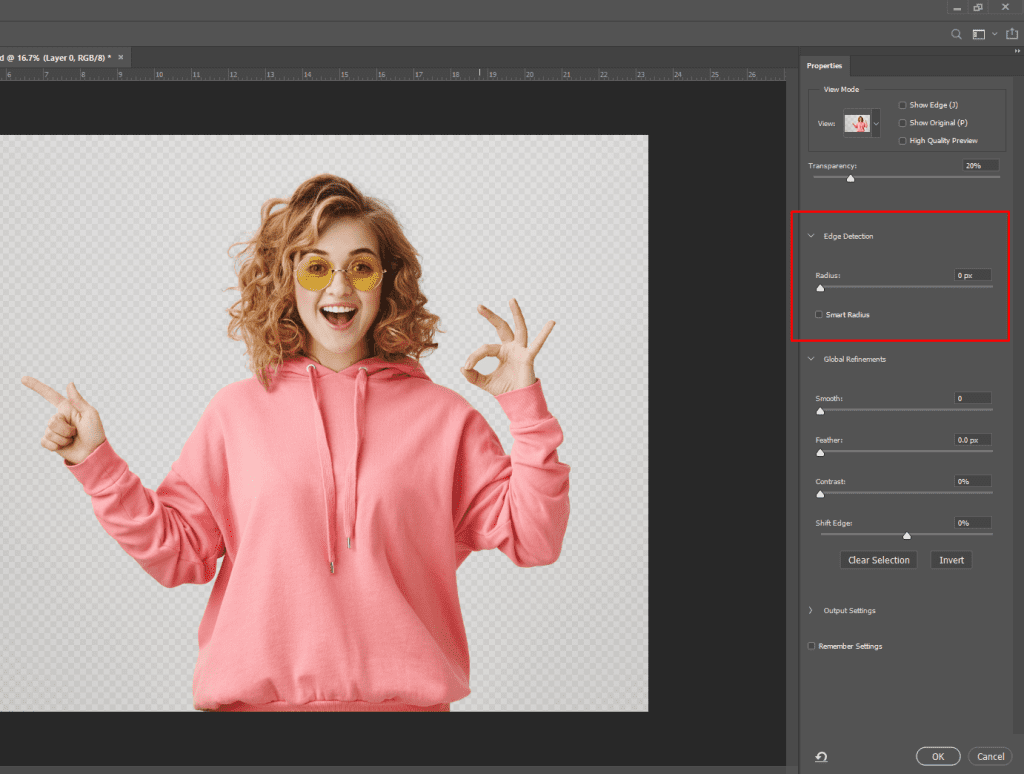
Find the rough edges with background lights or undulations. At the Edge Detection window, there are Smart Radius checkbox and Radius slider. Keep the values low there and raise them slowly. Leave unchecked the smart Radius.
Increase the pixel of the Radius if you think the detection result is not good enough. Check the work edges once more, for that 5-pixel would probably be an ideal pick. The value may vary according to the image complexity.
Apply Refine Edge Brush Tool
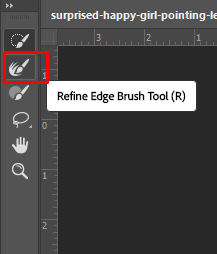
The image with the edge containing an irregular curve will be challenging to smooth. This tool is a good choice for fixing complicated edges.
To use the tool, click on brush & select. It’s the 2nd Refine edge brush.
After marking the rough edges, zoom in for a better view of the ragged edge. The refine brush tool size is changeable. We recommend you begin with a small brush.
Put your mouse pointer over the edges and begin to paint. Within a moment, the area would be smoother. Check if the task is completed properly. You can zoom in up to 400%.
Use the Burn Tool
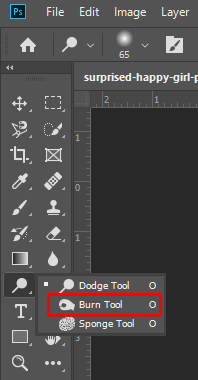
At the toolbar from the left side, you’ll find the Burn Tool. Select it. Then check the Options bar at the top. Change the Range drop-down to Shadows. Also, set the Exposure to 15%.
Press Alt and zoom in. Get a clear view of the rough edges and paint with the mouse on the jugged portions. Check the changes after it’s done.
The Dodge Tool

The Dodge Tool comes at the very next. Find the dark edges by zooming in. Drag over the edge after changing it to highlights. Paint gradually with the burn tool and make a softer and natural edge.
Apply Gaussian Blur
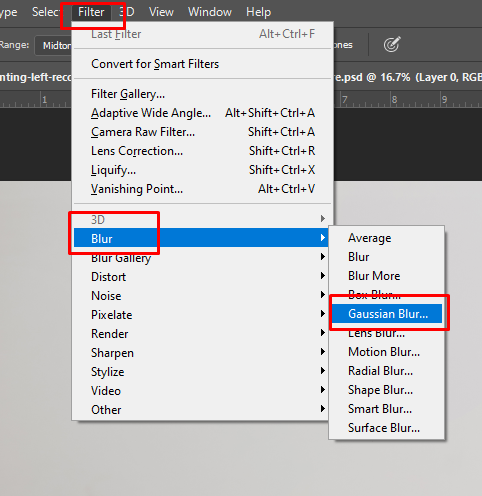
Gaussian Blur is another way to fix the jagged edges. Here is the command below for that.
Choose Filter-Blur-Gaussian Blur.
Get your jugged edges smooth within seconds. If there are more rough edges, choose a high blur radius. The radius slider is changeable, and you can increase or decrease that.
More improvements are possible by picking the correct radius. Check the visual display for that.
Use Level
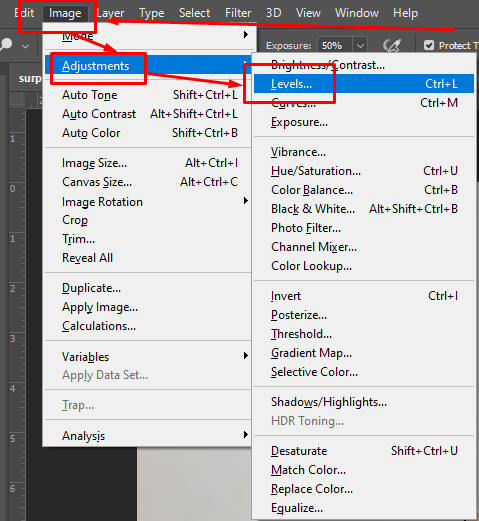
Choose image- Adjustments- Level
It is the command for level adjustments. It effectively turns your uneven edges into a level.
You will see the window at this stage displaying three sliding arrows. Right and left arrows will help make your image white and thin, respectively. The middle arrow is for generating the combination of this two.
Lead selection
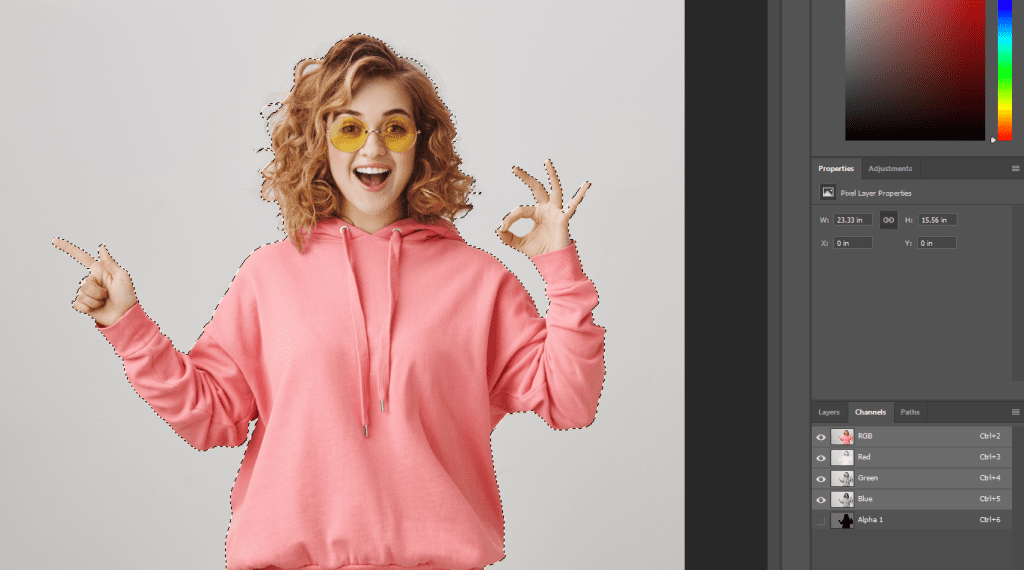
Lead selection is selecting the image’s white area. For this, the command is-
Cmd/Ctrl+Click on the Channel
Selecting RGB will bring back the main channel.
Masking
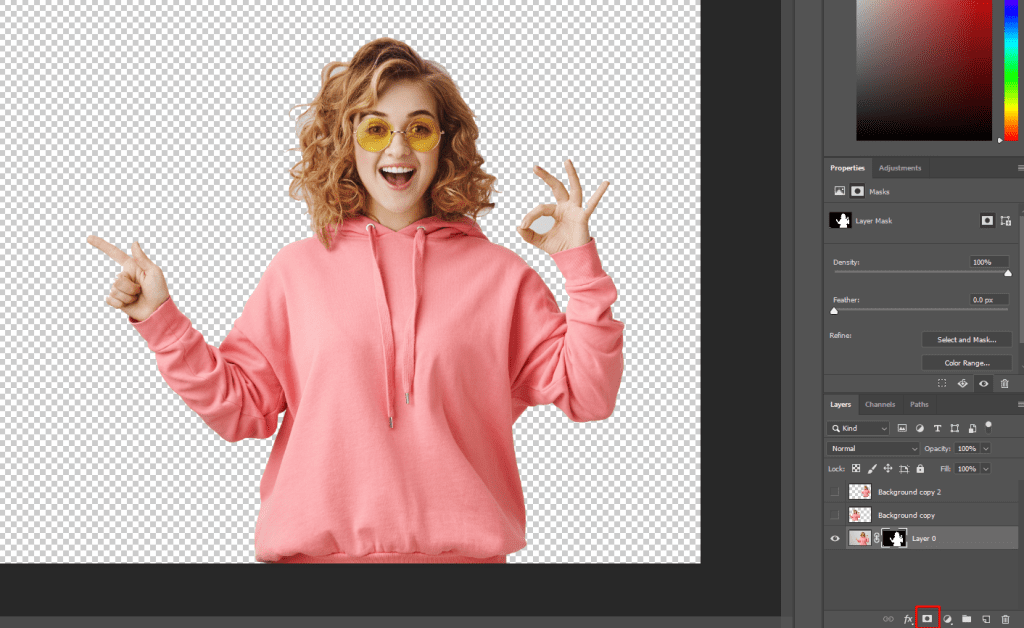
It’s time for image masking.
Hold Down Alt/Option and press on the new layer mask button. The button will be at the right of the bottom side.
Here’s the application of smooth edge in Photoshop done.
Last Words
Smooth edge plays a vital role in online marketing. Once you understand its importance, you won’t compromise to make an interesting image to attract the audience. Advertisers, e-commerce owners, photographers, and even celebrities need smooth edges.
A smooth edge can be done by himself following the method mentioned above or by the experts such as professional photo editors.
Frequently Asked Questions
What is the best tool to do smooth edges?
The greatest tool for creating clean borders is Adobe Photoshop. Because it enables depth control and hand-drawn paths, it aids in correctly fixing rough edges. Additionally, the many practical smooth tools make it simple to smooth out rough edges and improve the appearance of the image.
Who needs smooth edges?
The online marketer urgently needs smooth edges. Most people in this digital age need a smooth edge to expand their businesses. A smooth edge is strongly desired by celebrities, e-commerce proprietors, advertisers, periodicals, and photographers. It aids in drawing in their intended audience. Soft Edge creates captivating photos that might increase traffic to your websites.
How do you clean jagged edges in Photoshop?
To zoom in on the area of the image with jagged edges, hold down “Alt” and use the mouse scroll wheel. Alternatively, you may zoom in to see the sharp edges up close by using the Zoom tool. When the Blur tool is selected, press “[” or “]” to change the brush size.
How do I make edges sharper in Photoshop?
1. First, convert the photo layer into a Smart Object.
2. The Smart Sharpen Filter is the second option.
3. Verify that the Lens Blur Remove Option is selected.
4. Set the Edge Contrast Amount Value
5. Decide on a radius value for the edge
6. Modify the Reduce Noise Filter.
How do you blend harsh lines in Photoshop?
Select the Smudge tool (R) from the toolbar. If you can’t find the Smudge tool, click and hold the Blur tool ( ) to show the other related tools, and then select the Smudge tool. Choose a brush tip and blend mode options in the options bar.


