

We live in a world where people can do wonders with visual effects. One of them is editing pictures exactly how we want them to be. With the help of tools like Photoshop and Illustrator, you can do many things you can never imagine with images.
Our discussion today is about using Photoshop for see-through pictures. It is an X-ray technique that provides artistic and transparent feedback to the images. Editors use this method to show the background of a subject in a picture.
Let’s learn how to create see-through clothes in Photoshop with 7 simple steps.
What is Meant by See Through Clothes in Photoshop?
Contents
See-through in Photoshop or X-ray effect in photoshop is an image manipulation technique that lets you turn the clothes into a completely transparent picture. As a result, the viewers can see the background clearly. The method is popular for making the picture artistic and comical to stand out from the crowd.
The X-ray effect in Photoshop is used to create X-ray images by revealing layers of hidden details. It can increase the popularity of your photos by removing specifics from them.
It gives the pictures an amazing point of view. Many marketers also use this technique to place their brand, products, or hidden messages within the images.
If you want to apply the process, there are only a few simple steps that you need to follow.
How to See-Through Clothes in Photoshop?
We will use Photoshop to guide you through the steps of see-through clothes in Photoshop.
Let’s get started.
Step 1: Select the picture you want to edit

The first step is the simplest of all. In this step, you will start by selecting the picture you wish to edit. The image you choose should be a good fit to implement the technique.
The best approach is to select a picture of a model wearing light-colored clothes. You can still pick dark color clothing, but the steps would become a bit difficult and advanced.
Step 2: Open the picture in Photoshop

Once you select your picture, open it in Photoshop. There are two ways to do this. The first way is to locate the file tab on the top of the application.
When you go there, you will find the “open” option that will allow you to select the picture you want to edit.
The second way is to press Ctrl + O on your keyboard together and immediately make the image appear on the screen.
Step 3: Select the clothing area in your picture

In this step, select the area you intend to transform into see-through. Start with the larger areas. You can start by selecting the shirt or the pant.
You can use the lasso tool to select the area of clothing. The tool is located on the left side of the software.
Apart from that, you can also open the tool by pressing “L” on your keyboard. Making the selection process accurate is key to getting a good see-through picture.
Step 4: Refine the edges of the selected area
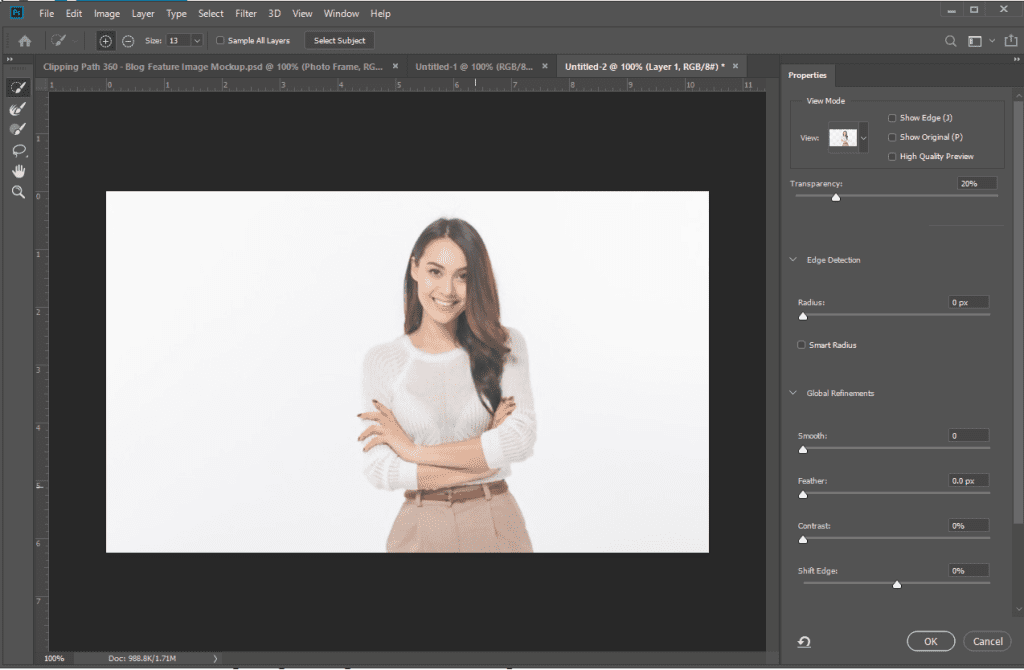
Once you have selected the area, you should refine the edges. You can use the Select and Mask option for this work. Press Ctrl + Alt + R on your keyboard to initiate the process.
Read More: How to Smooth Edges in Photoshop
Step 5: Copy your selected area
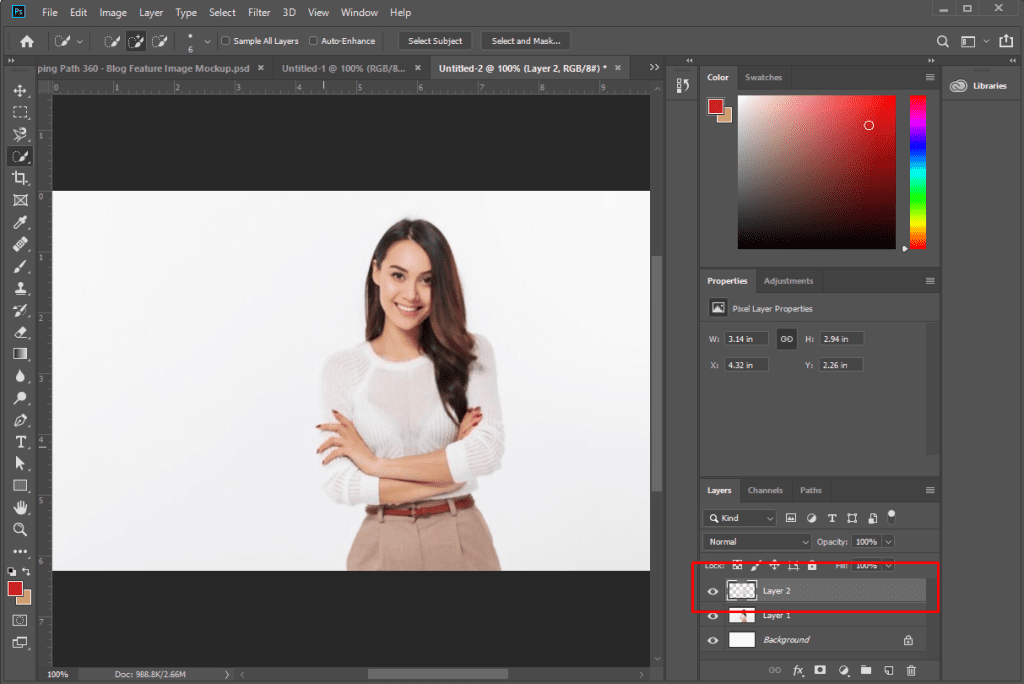
Now, create a new layer with your selected area. You can copy the area you selected and then press the Ctrl + J shortcut on your keyboard.
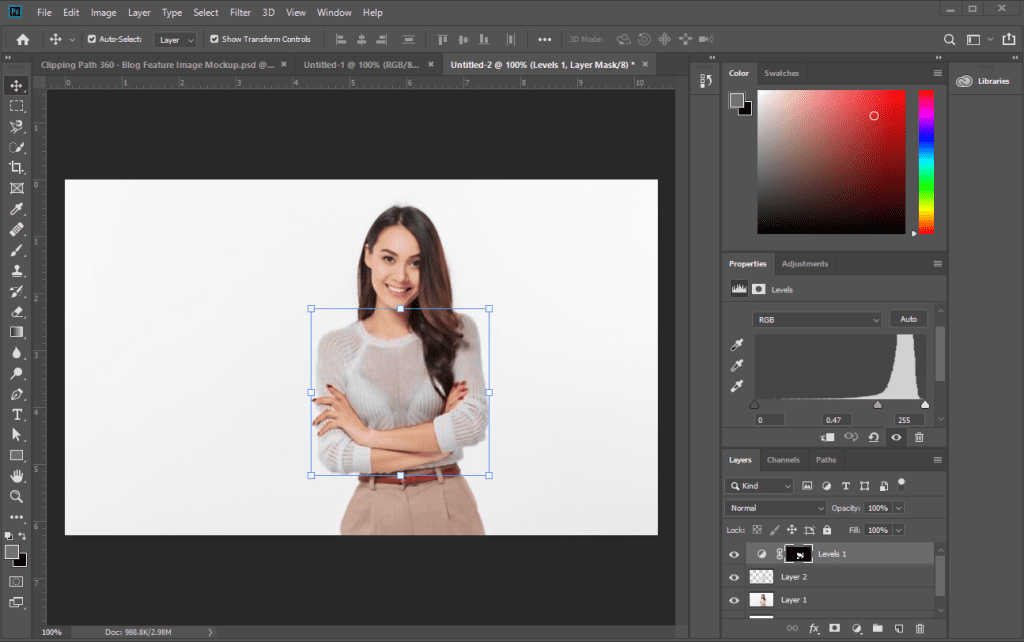
Step 6: Turn the clothing area transparent
We’re almost at the final steps of the process. It’s time to edit the picture and make it transparent.
To do this:
- To pick the dress layer, first, choose the adjustment area.
- While holding the Alt key, click the clothing layer while it still hovers.
- By doing this, you can adjust the desired apparel without impacting other image elements.
- Adjusting the RGB of the area can help you create a transparent effect.
- Play around with the RGB by taking it up or down until you get the desired result.
Step 7: Finalize and save

Once you finish the RGB, you should notice that the picture is see-through. Make any necessary changes before finalizing.
Now save the image, and you can use it accordingly.
Conclusion
The see-through clothes in Photoshop are a handy technique for photo editors. You can use see through clothes online tools. It creates fun images that are a remarkable trend in today’s digital world. It can give uniqueness to brands of social media pages.
Making a picture see-through is an easy technique. All you need is to follow the 7 simple steps, and you are good to go.
Follow this video:
Frequently Asked Questions
Can you remove clothes in Photoshop?
Yes, it is possible to remove clothes in Photoshop. You can add layers over the clothes to make it seem like there are no clothes in the picture. But you cannot just directly remove something in a picture with Photoshop.
Is there a see-through clothes app for iPhone?
Yes, there are plenty of see-through clothes apps for iPhone. Just search on App Store, and you will find several high-rated apps.
How can I edit my clothes in a picture?
One of the best apps to edit your clothes in a picture is YouCam Makeup. The app is available in both Google Store for Android and App Store for iOS.
Is there a filter to see through clothes?
You can find a filter to see through clothes in various ways. One of the popular features is the “Photochrom” filter that allows you to do that.


