

Whitening teeth in photoshop is easy, yet it’s tricky. For example, working on the teeth might affect the gums too. For that, I have 3 methods and some helpful tips. So, I am here to help you learn how to whiten teeth in photoshop.
Two Things to Keep in Mind
Contents
When it comes to whitening teeth, we need to remember two things. The first thing—you don’t want to over-whiten them. Also, not so much that it’s easy to understand that the photo is retouched. The point is, you need to find the natural balance to make it look realistic.
The second thing is that— you must understand the difference between whitening and brightening.
So, what is whitening? Whitening is removing the unwanted color from the teeth. In most cases, it is yellow.
On the other hand, brightening is simply increasing the brightness, which we want to avoid.
How to Whiten Teeth in Photoshop: Two Simple Way
There are several methods you can whiten the teeth in photoshop. Here are two simple ways you can do it.
Method 1: Setting the vibrance
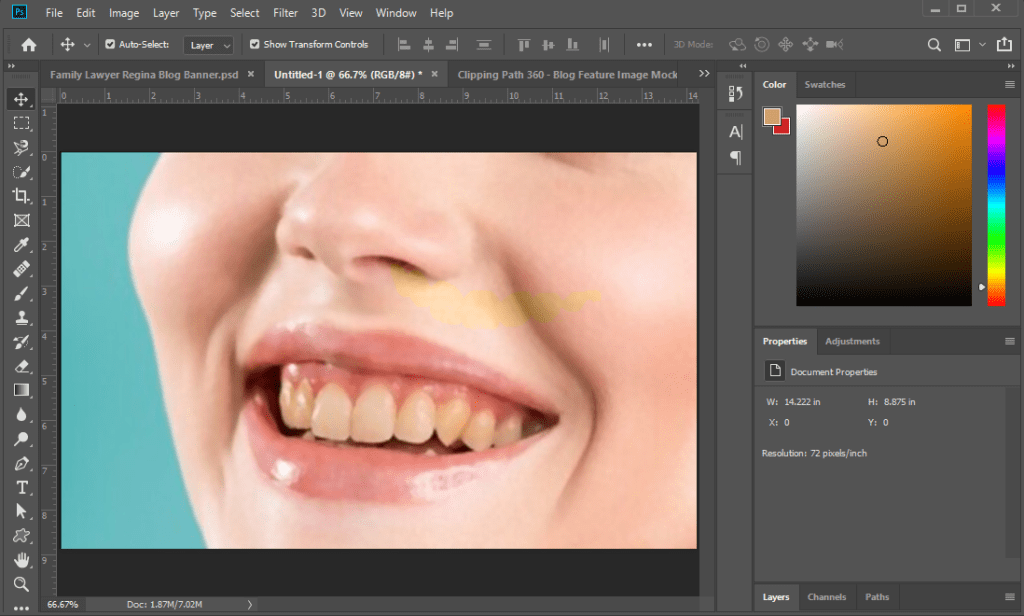
You might already have a photo on your hand to edit. Or you can simply download a picture of a person having teeth with a little yellow tint.
Step 1: Create an adjustment layer

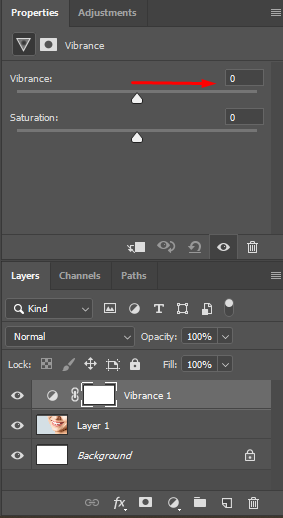
Go to the properties pane and click on the circle icon at the bottom. Once the whole list of the layers appears, select Vibrance. Now, let me tell you a little about vibrance.
Vibrance is like saturation for the mid-tones. That means, it will increase or decrease the color of just the mid-tone. In this case, yellow is there in the mid-tones.
Step 2: Decrease the vibrance
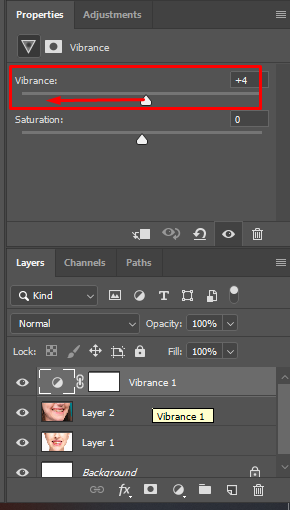
Once you select vibrance, two lines with pointers in the middle will be there at the top. Next, in the vibrance line, drag the pointer to the left to decrease the vibrance. In fact, you need to take the arrow all the way to zero. And, the yellow will be gone.
Now, the problem is that natural yellow from the other areas will also disappear along with the yellow on the teeth. For that, you need to complete a few more steps.
Step 3: Masking
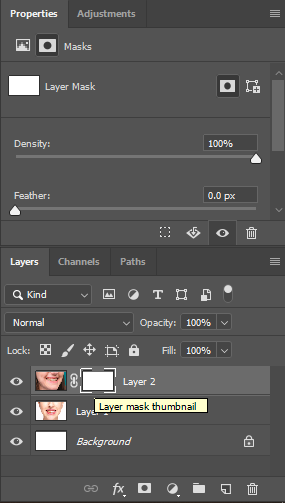
Since you want to set the effect on the teeth only, you need to select the Mask. So, press Ctrl-A and Command I.
If you don’t understand the concept of masking, know that—black conceals and white reveals wherever. Remember that whenever there is black, the effect of the layer won’t show up. And if there is white, it will show up.
Now, take the brush tool and make sure the program color is white. Then zoom in and make the brush a little smaller to get the perfect result.
This strategy will prevent the edit from affecting the gum. Hence, you have to be careful with the teeth when you are working on teeth.
As accidental touches over gums will result in color loss, you can increase the flow slightly. You can make the flow 200, so it only makes the teeth white.
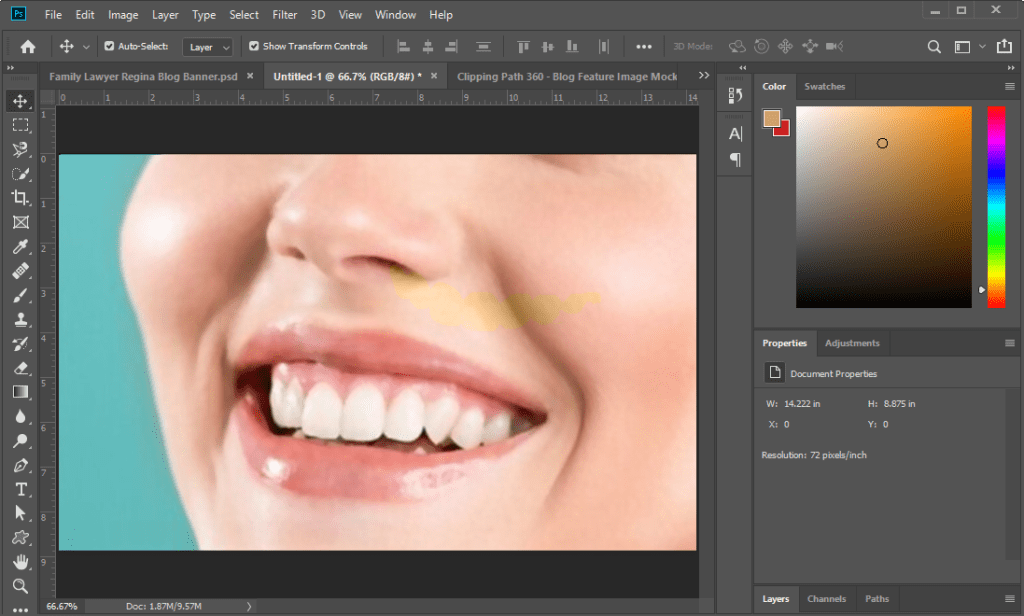
Once again, we are not brightening them, we are just whitening them. Next, have a look at the before and after picture. This way, you can identify the difference. To do it effectively, you can increase the color.
Step 4: Removing effect from the gums
Even if you accidentally go over the gum a little, you can mask it. For that, take the brush and then select the Mask. After you go over the teeth, you will see that the actual color is gone.
As a result, the gums will look unrealistic if you zoom in to look at them carefully. To handle that, you can paint the gums a little bit.
To fix the gums, you have to paint a little more with white. You can always utilize the keyboard shortcut. So, press X to toggle between the background and foreground.
Now, you must make the foreground color black. After that, you can paint it. This way, you can get the original color back.
Step 5: Increase the vibrance
To increase the vibrance, you can check the before and after once again. Next, go to the layer and select the arrow icon (vibrance) beside the back layer. After that, the line for the vibrance will show up in the properties panel.
Next, take the arrow of the vibrance line to the left. I can’t tell you what percentage you should keep it. You need to identify how much you need to increase the vibration.
Read Also: Copy a Layer Mask in Photoshop Elements
Shortcut: How to make teeth whiter in Photoshop
Import a photo > Zoom in > Add a vibrance adjustment layer > Decrease the vibrance all the way > Invert the Mask with control & command I > Take the brush tool > Select white as the foreground color> Then paint over the teeth carefully > Increase the vibrance so that it looks realistic > Check before and after
Alternative method: Hue/ Saturation

Step 1: Open a photo and zoom in
Step 2: Select the yellow shade on the teeth
Step 3: Click on the adjustment layer icon. Next, choose hue/saturation. In the hue/saturation, there is a hand tool. With the hand tool selected, click on the yellow color on the teeth. Next, the yellow will show up in the properties box.
Step 4: Now, fully increase the hue and saturation in the properties box. This helps you see which areas are being affected.
You will see two more color lines. One line will show the range you are affecting. After that, you need to move the range left and right to see exactly which areas it affects. You can move the range until it involves the gum.
Step 5: Next, make the range larger to ensure all the teeth are selected. The transition won’t be smooth this way. To make the perfect transition between selected and not-selected areas, take the outside slider to the left and the inside slider to the right in the last range-selection line. The more the distance between the inside and outside slider smoother the transition.
Step 6: Finally, set the saturation and the hue back to normal. Now, all you need to do—decrease the saturation, and the yellow will disappear.
Shortcut: Photoshop whiten teeth
Create hue/saturation adjustment layer > With the help of the hand tool select yellow shade > Move the hue and the saturation all the way to the right to see which areas are being affected > Use the range to refine your > Bring hue/ saturation back to normal and adjust it accordingly.
Wrapping up
There are several methods to whiten teeth in photoshop. I have shown two methods here. Once you have practiced, you will know which is the most convenient for you.
Frequently Asked Questions
How can I edit a picture to whiten my teeth?
Follow the steps to get started.
- Download the Best Teeth Whitening App. To whiten teeth in photos, start by downloading the free YouCam Makeup app, available for both iPhone and Android.
- Upload Your Photo. …
- Tap Retouch, then Teeth Whiten. …
- Whiten Teeth with a Slide Bar. …
- Save the Photo.
What photo editor can whiten teeth?
Fortunately, using Fotor’s teeth-whitening function is completely free. There are no conditions and no credit card required. Try it right away to make your smile even more radiant and your teeth as white as pearls!
How do you make a true white in Photoshop?
- Begin by opening your image. …
- To find it, open your “Levels” window, either by clicking on the little bar graph icon at the top, or by going up to the top toolbar and clicking Image > Adjustments > Levels
How do I color correct in Photoshop?
1. Select Levels or Curves for tone and color.
2. Select Color Balance or Hue/Saturation to change the color.
3. Click Black & White to change a color image to black and white.


