

Shoe photographing takes a lot of effort and patience. Sneakers can be easy to photograph, but not high-end Jimmy Choo stilettos. Knowing how to take pictures of shoes is essential to capture a pair of shoes in a frame perfectly.
Quality shoe photographing plays an essential factor in driving shoe sales. A perfectly captured picture of shoes can attract a significant number of clients. Or, you may sometimes want to capture your shoes to upload on Instagram or Twitter.
With that said, it is the right time to boost your shoe photography skill up. Here we’ve added a quick tutorial on how to take pictures of shoes to sell. You will get to know how to photograph shoes to be at the top of Tweeters or IGers.
We got tips on shoe photographs for those struggling to take a decent photo. Whether you are photographing shoes for your website or Instagram, the following tips are must check.
Shoe Photography for E-Commerce Business
Contents
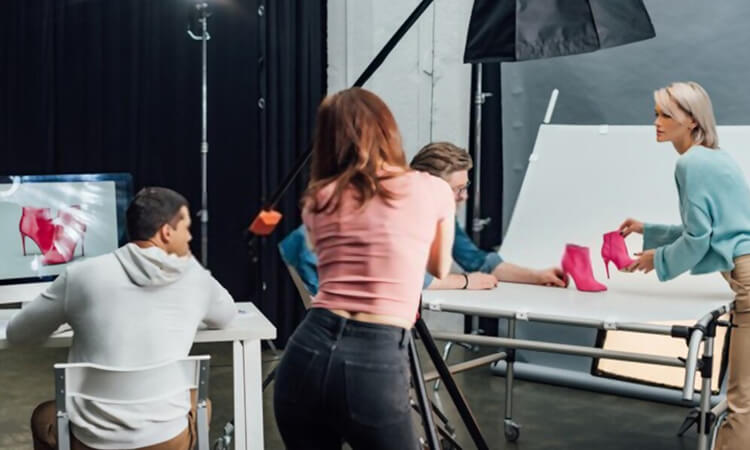
Photographing products plays a crucial role in the E-commerce business. If you manage to display your products correctly, it can engage the visitors. The visitors will then show interest in the products, and thus it will boost the sales.
If you are a beginner, it may be challenging to get a good shot of the product. Before you take a snap of your product, there are many ways to go about it. In this article, we will explain how to achieve perfect results step by step.
How to take a picture of Shoes?
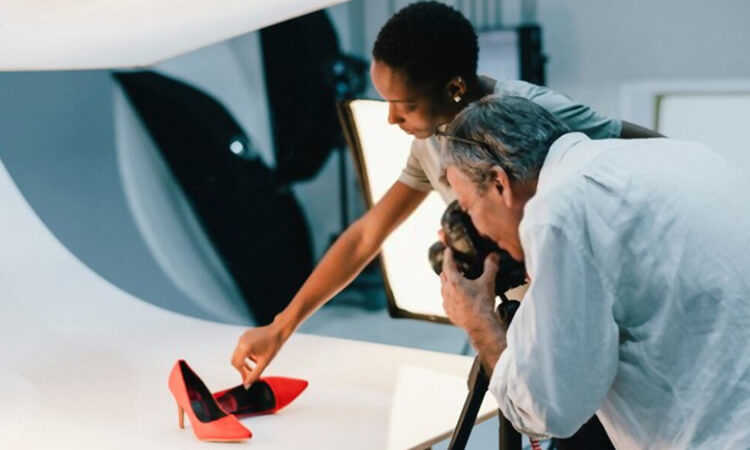
Photographing shoes is somewhat different than photographing other products. It not only requires photography skills but also requires attention to detail. Doing this can only get you good results.
The First Thing to Keep in Mind – Avoid Distraction
At the Beginning!!
Choose a platform for your shoe photography with zero distractions. Zero distraction denotes a solid background. Many top e-commerce platforms claim that photos with a solid color background make a good impression.
Background with distractions or unwanted objects makes the product indiscernible. It is better to use a solid background with no patterns. Or, if you want, you can use a solid color background such as a backdrop.
You can also use a soft lightbox to have a solid color on both the background and surface. A soft lightbox can be made by yourself to reduce setup costs. If you often need to photograph your products, invest in a lightbox.
Don’t keep any objects in the frame if you shoot your shoes following flat lay photography. It will distract your shoes in the photo. Make sure you have a clean frame that provides a pleasing experience to the viewers.
Thus, it will attract the viewers to make the purchase. With that in mind, get started with the following tips and tricks.
Read More: How to Remove Background on Photoshop
Set Up a Proper Backdrop
As mentioned, any product with a white or solid color background looks very stylish. Get a lightbox or a roll of seamless white paper to create a solid background for your photos.
This setup will give you a high-quality and non-reflective surface. Elsewise, you may have to invest a lot of time to get just a perfect shot. DIY your lightbox or hang a seamless paper.
Then, you need to know how to position shoes for pictures. Set the shoes in the middle of the shot. Don’t set them too far from the scene because it’ll create strange shadows. These shadows are hard to delete.
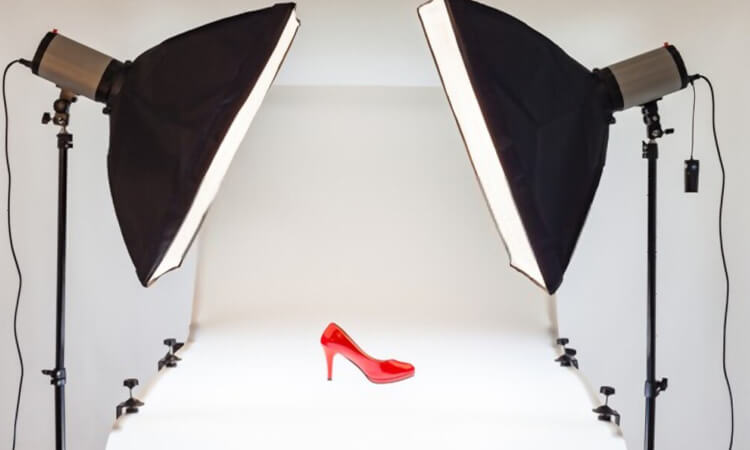
Add Proper Lighting
Proper lighting can make your ordinary product a masterpiece. But, it requires expertise to understand how much light is enough to make a photo exceptional. Having the slightest knowledge about photography lighting is essential as a photographer.
Use as much light as needed for the frame but don’t overdo it. There is a very thin line between proper photography lighting and overdoing it. You must go where to draw a line to get a stunning photo.
Using natural lights is suitable for photography, but only natural lights are not enough for shoe photography. If you want to use natural lights, you can follow golden hour lighting. However, most of the shoe photography is done in-house.
So artificial, but proper lighting is a must. Create a setup where the lighting is not too harsh or too soft. Make sure your shoes get the light it requires from each angle. A three-dimensional setup is the most accurate lighting setup for shoe photography.
Get a Professional Camera
Nowadays, people have high-resolution cameras on their smartphones. These cameras are powerful due to their latest technology. You can get a good-quality photo with these cameras. But the quality of details isn’t that satisfactory.
Any photographing requires post-processing, where many issues need to be fixed. In the case of shoe photography, you will have less control over the details of the image. Hence, we suggest investing in a professional DSLR camera.
Get the Correct Angles
The angle of the shoe matters a lot. In this case, more is good. There are many things in the shoes that customer wants to check. Hence they check the shoes from different angles, from the inside sole to the bottom layer.
That’s why everything needs to be photographed from different angles. You must ensure a 360o product viewing experience for your customers and retailers. Top-down, head-on, and three-quarters are the three angles you cannot miss for shoe photography.
Doublecheck the Details
Though shoes are functional items, they are also fashionable items. You need to check every detail to feature any attractive points highly. It could be either a logo or trendy seams. If you find anything appealing, just capture it.
Retouch in Photoshop
Even after capturing picture-perfect shoes, there are many things to fix in them. You need to fix many issues to make the shoes presentable. Maybe you want to specify a tiny scratch found in the photo or increase the contrast.
No matter how precisely you have captured an image, there may be many things to correct. The shoes are captured on close shots by keeping details in mind. So get a professional image editing app and retouch your captured image.
You can easily edit the tiny flaws like dust and spots in Photoshop. However, you can consider taking professional help as online stores have specific product photography requirements.
Things to Consider in Shoes Photography
You can consider the following tips to make your photography more effective.
- Keep the entire setup consistent
- Cleanliness is must
- Use stuffs like tissue or hard plastic bottles to create an optimistic illusion.
- Use background of different solid colors rather than an only white background
- Use correct lighting and color
- Take close up shots
- Have consistency throughout your setup
Final Words
Thus far, you’ve learned how to take pictures of shoes like a pro. With all these tips and tricks, your next shoe photography project should be a piece of cake. Also, you can make your future projects more effective.
Nonetheless, practice is a must to bring perfection to your image. You likely don’t want to create the wrong impression on your customers with a low-quality image. So, make sure your clicked photo always represents reality.


