
Knowing which procedure is ideal for the sort of image you’re working with is crucial to achieving the greatest results with the finest technique.
Here is the way to remove background from images using Photoshop, as well as when to apply each one for the best results.
With all of Photoshop’s recent improvements, removing the background from a picture has never been easier or faster. Learn how to remove a picture’s backdrop in Photoshop.
Remove Background with Photoshop
Contents
Step 1: Ready Your Tool
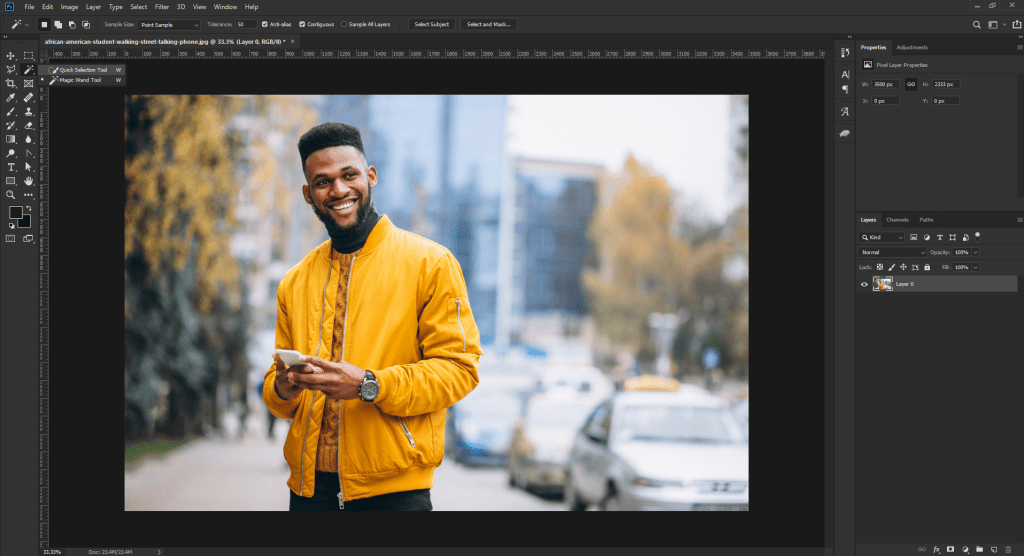
Open your photo with Adobe Photoshop first. Select the ‘Quick Selection Tool’ from the tools menu to remove the backdrop. (How come you can’t find the ‘Quick Selection Tool?’) The ‘Magic Wand Tool’ may be used to nest it). For simple background removal, the ‘Quick Selection Option’ is the ideal tool.
A context-sensitive menu appears at the top of your workspace when you select the ‘Quick Selection Tool.’ Select ‘Add to Selection’ before you begin. Depending on the size of your photo, you may need to use the ‘Brush Picker’ and raise or decrease the brush size.
Step 2: Remove Background Imagery with a Selection
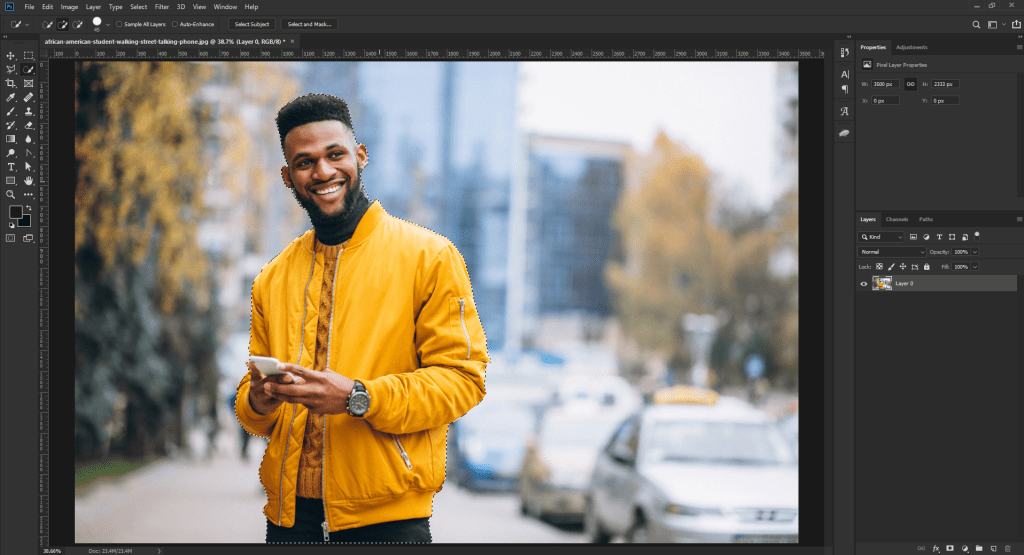
Click and drag your mouse on the unwanted background once the tool is ready. As you click and drag, a swarm of marching ants, or selection, will develop and expand. Work your way around your subject, gradually expanding your options.
You may notice that certain sections of your choices are added that you do not wish to include. Toggle the tool’s subtraction mode by holding down the ‘Alt’ or ‘Option’ key, then click and drag your mouse over the background region you want to delete. When you’re ready to add to your selection again, release the ‘Alt’ or ‘Option’ key. As you work, switch between the addition and subtraction modes.
Zoom in closer to work on more difficult regions, such as the backdrop and the subject. Smaller features, like as shoestrings, are not need to be included. However, lowering your brush size to 1px might help you catch even the tiniest details.
You’re ready to go on after your subject is totally contained within a selection.
Read Also: How to Change Image Background Color in Photoshop
Step 3: Refine the Edges
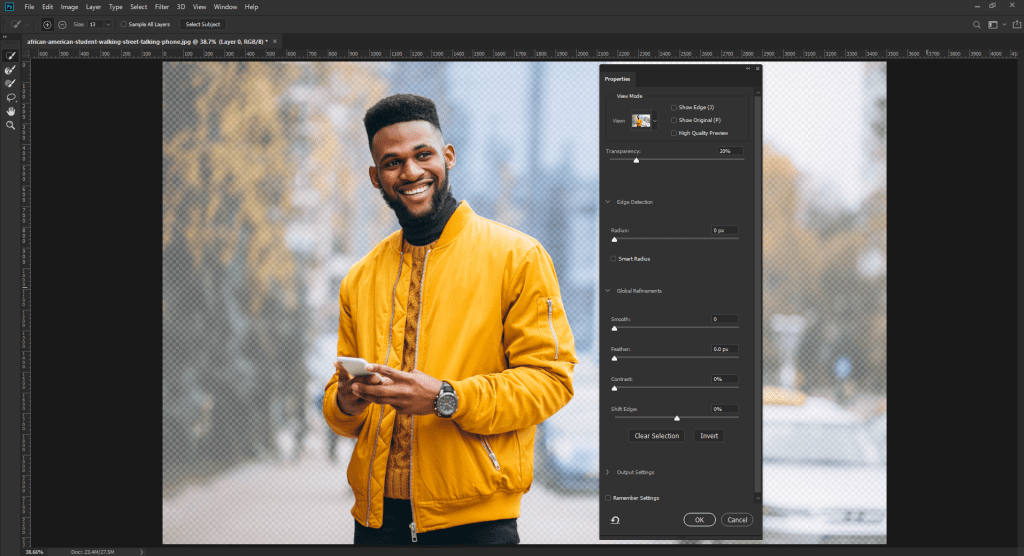
Right-click within the marching ants and choose ‘Refine Edge’ from the pop-up menu after the selection is complete.
For best results, use the Refine Edge dialogue to fine-tune your pick. To begin, set the View Mode to ‘On White’ or any other choice that contrasts dramatically with your pick. This will let you to see the areas of your edge that require the greatest assistance.
Increase the Smooth value slider under Adjust Edge to smooth the rough edges of your pick. Additional sliders may need to be adjusted, but smoothing should be the most beneficial. When you’re finished, click OK.
Step 4: View Your Selection On a New Layer

Reviewing your results is the last step. Choose Layer Via Copy from the context menu of your selection. Without editing your original photo, your pick will be assigned to a new layer with no backdrop.
To compare your finished item to the original image, turn off the visibility of your original backdrop layer.
The first step in successful compositing is to remove the image’s backdrop. With the background eliminated, you may use your imagination to create a new setting for your subject.
Must Read: Copy a Layer Mask in Photoshop Elements
Tools We Don’t Recommend
There are a couple of tools which is not recommended when it comes to removing and replacing background in Photoshop.
Remove Background
At first glance, this relatively innocuous button appears to be the solution to many of the procedures I’ve mentioned thus far. However, I wanted to show you several other possibilities before presenting this one since I was afraid you would quit reading at that point. Also, there is no way to adjust the selection before the background pixels are erased, so this isn’t truly a “selection tool.”
In the properties panel, there is a Remove Background button in addition to the Select Subject button. This method uses the same technology as the Select Subject function, but it inverts the selection and then deletes all pixels in what it considers to be the backdrop.
Figure 11 shows how this option can do a great job of removing the backdrop around Kate, but keep in mind that this is a one-time deal. The selection step cannot be refined or edited. As a result, I do not recommend this tool for high-quality selections, but it may suffice for personal tasks on occasion.
Background Eraser / Magic Eraser
The Background Eraser and Magic Eraser, like the Remove Background tool, sound like fantastic ideas, but I don’t suggest them. The reason behind this is that these tools remove pixels, which can only be retrieved by redoing your actions. You may always return to the masks and make extra tweaks and refinements if you don’t flatten the.psd file before saving if you use selections and create masks.
Conclusion
On one side of the coin, it’s true that these are hacks, or simple ways to do what you can’t. But, on the other side, these hacks will give you enough time to focus on actually working on your image, instead of switching between your editing tools. With this article, you’ll be able to take the first steps towards learning how to remove backgrounds on Photoshop. With any luck, you’ll be able to remove backgrounds from your images using these methods.
Checkout This Video:


