Want to portray a murder scene like it just happened in front of you using Photoshop? Do you know you can do it pretty easily by yourself? Your passion for painting expresses your desire to highlight the blood splatters drawing.
You just need some tools and learn the method for it. The following discussion will teach you how to draw a blood splatter on your photo.
Install Blood Brushes
Contents
- Select the Brush tool in Photoshop, and then click to bring up the Brush Preset Picker at the top of the screen of the options bar. Select Preset Manager by clicking the cogwheel in the top-right corner.
- Select the blood brushes in the Preset Manager, then click OK.
- Compile all the blood brushes into one set so you can find them easily and be accessible for usage later. Click the first blood brush in the Preset Manager, hold down the Shift key, and click the last brush. Lastly, click Save Set.
- Select Photoshop > Presets > Brushes, and give the name Blood Brushes. Save it to your computer, and then click OK.
Use the Blood Splatter Brushes
- To launch the Color Picker, click the toolbar’s foreground color.
- In the center, you will find a vertical line of various colors. Move the cursor up or down to select the starting color.
- As you’ve selected the color, focus on a particular region. Drag the circle cursor by clicking inside the big square. You will observe the differences that various square corners produce.
- The preview window allows you to examine the color in real-time. Click OK to exit the Color Picker after you are satisfied with the color.
- Create a new blank layer and give it the name “blood” before adding it to the layer stack.
- After selecting a blood brush from the Brush Preset Picker, click the Brush Panel icon to modify the brush’s behavior.
- Set Size Jitter to 75% and Angle Jitter to 100% in Shape Dynamics. Change the opacity Jitter in Transfer to 100%.
- The blood effect will appear quite flat. You can fix it by switching the blood layer’s blend mode from Normal to Overlay and then modifying the layer’s opacity.
Also Read: How to Copy a Layer Mask in Photoshop
How to Make Blood Splatter in Photoshop?
- Open Adobe Photoshop and choose the image you want to add blood on.
- Add another layer. Choose the “Layers” sub-menu option from the “Window” drop-down menu. With this, you can add a fresh layer to an existing image.
- Select the “Lasso” tool from the toolbar, and draw an outline of the area where you wish to add blood. To add a dark red tone to the previously generated defined portion, select “Fill” from the menu. Now, remove the selection from the area.
- Click the “Layers” tab’s drop-down menu and choose “Color Burn” from the list of available options.
- Pick a tiny brush size from the toolbar and click the “Smudge” tool. To create the appearance of bleeding, gently brush the red color downward using the ‘Smudge tool.’
- Use “Burn” from the toolbar to darken the wound’s core. It allows you to give it a more natural wound-like image.
- Select “Filter,” then “Texture,” then “Texturizer,” from the submenus. Choose “Burlap” from the “Texture” drop-down option. You need to change the ‘Scaling’ to 200 percent.
- By adding these last few details, you have produced realistic-looking blood that you may use in all of your favorite images.
Drawing Blood Splatter Pattern Using Smooth Circles and Lines
Step 1
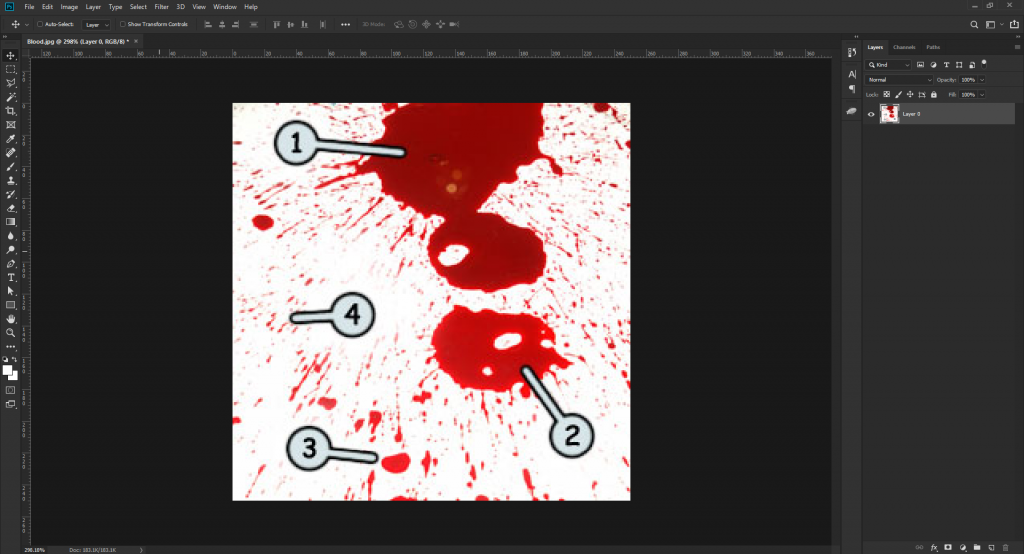
It takes some skill to create realistic-looking blood in images. Blood splatter on a wall will never seem the same in a repeated stroke. You will notice in the picture that the blood might often be ticker or cleaner.
Since liquids can change any time, make sure your drawing appears spontaneous. Take a close look at this picture to fully see how this blood splash was produced.
Step 2
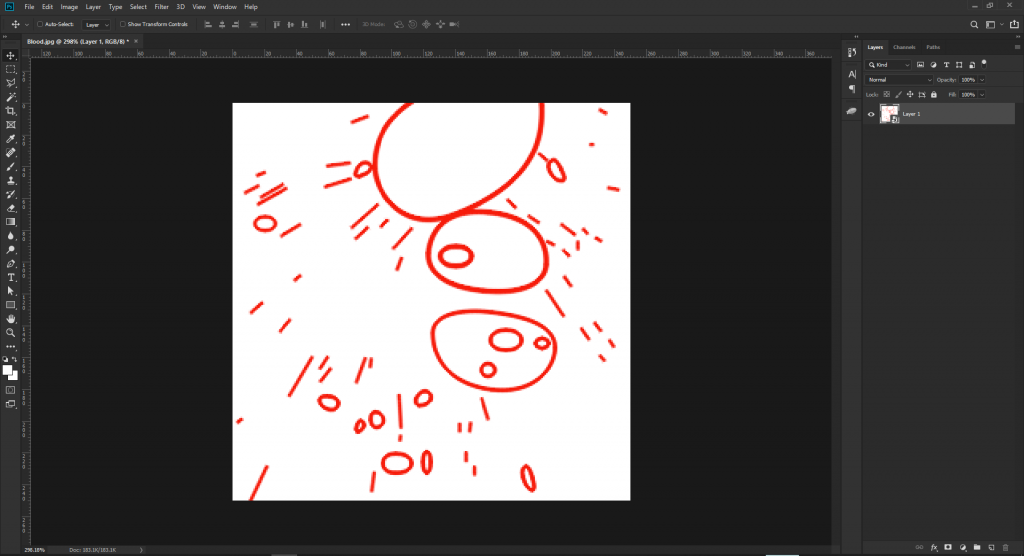
The shapes to make this artwork are really simple. For the blood splash effect, use lines and circles. You’ll see that some of the little drops of blood have an oval shape, and others have a circular shape.
Step 3
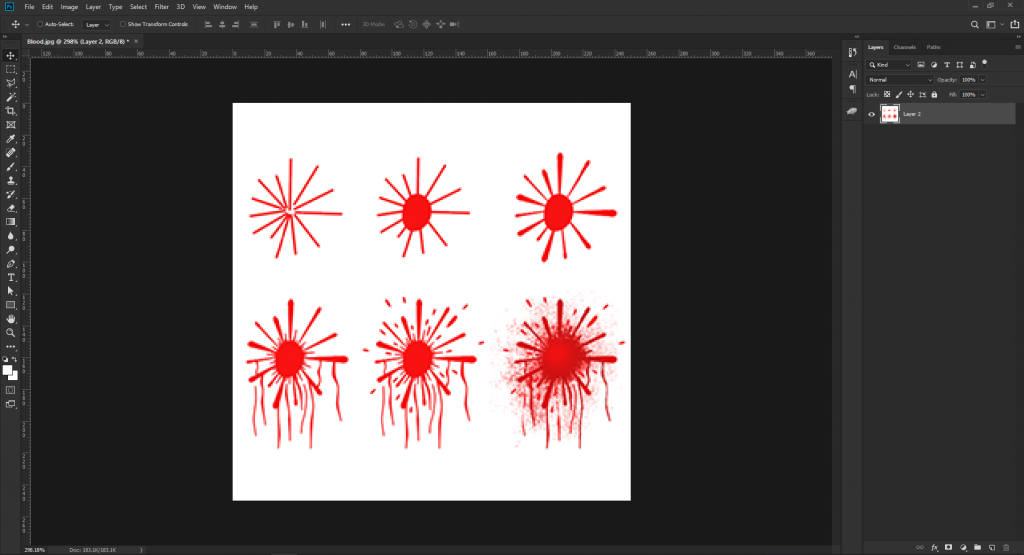
To start, make some lines that resemble a splash on a wall. After that, make a circle in the center. Draw several lines to indicate blood droplets falling to the ground. Add particle effects and slightly change the color of the blood to complete your picture.
Step 4
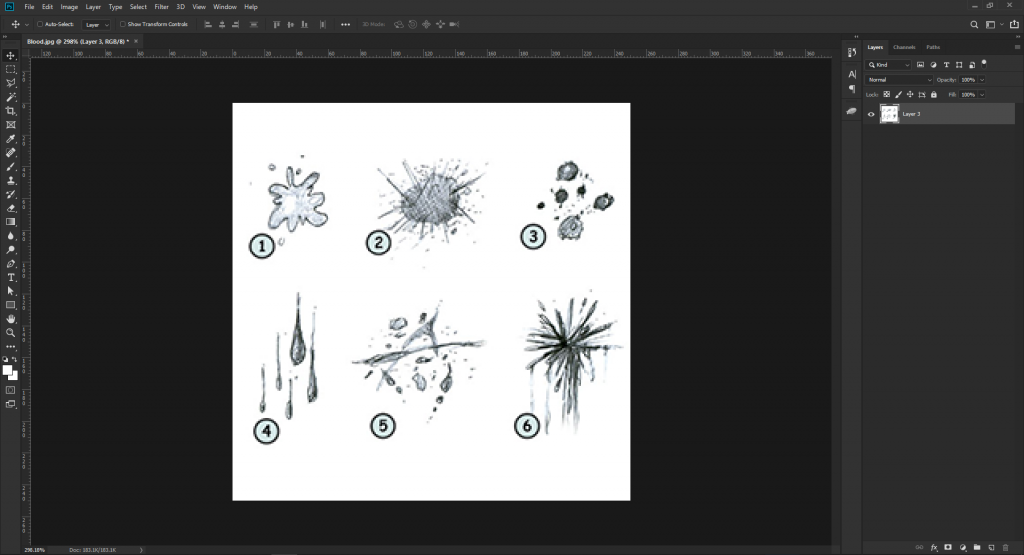
You can see how to draw an upfront splash of blood on a wall in the example above. However, this fluid might also appear as stains, streaks, or drips. Remember to keep it irregular, organic, and spontaneous.
If you want more ideas or illustrations, don’t be afraid to spill some liquid on the ground.
To wrap up
Fake blood drawing may not be for the weak stomach or heart, but it is an exceptional type of art. Don’t think that anyone will judge you based on how much you love it. Just express what is on your mind, put them all on the page, and you’ll ultimately find people loving them.
Frequently Asked Questions
How can I create dripping blood effects in Photoshop?
The brush size, density, and pressure can be adjusted in the Liquify window’s Brush Tool Options to any value that you want to work with. Then, use the Forward Warp Tool (W), click and drag from top to bottom to create the dripping blood effect.
How do you make a blood effect in Illustrator?
Grab the Paintbrush Tool and select the Brushes panel from the Window menu. Simply create some paths around your text using the “7pt. Round Calligraphic” brush from the ”Brushes panel.’ The blood will start showing by these.
How do you draw blood splotches?
All you have to do is draw various blood drip shapes and sizes. Finish the tear shape in the center, then add splatter lines and drip lines to the top of the right blood stain. Draw a few pointed shapes for the blood pool, followed by razor lines and shapes for the blood splatter.
How do you draw fake blood?
- In a mixing dish, combine 1 cup corn syrup and 2 teaspoons chocolate syrup.
- Stir in the red food coloring until the mixture is a rich crimson hue.

