

Need to change the format of a layer in Photoshop without losing all the hard work you’ve put into it? Rasterizing a layer is a great way to change its format without compromising any of the data in the layer.
This tutorial will show you how to rasterize a layer in Photoshop and some of the best ways to use this feature.
Before that, you need to know the following things to understand the process better.
Reasons to Rasterize a Layer
Contents
In many circumstances, rasterizing in Photoshop is necessary since the application requires it. When you try to do an editing operation, a prompt appears that says you need to rasterize in order to proceed. You may either comply and rasterize the layer at this point, or you can pick other path or method.
Rasterizing isn’t always a terrible thing, as the transition from vector to pixel format is usually undetectable. Unless you zoom in close or blow up the image, the lack of immaculate borders is barely evident. If you want to print the image in a big format, for example, the pixelation generated by rasterizing may be visible. However, rasterizing will have no effect if the photo is kept in a regular size digital format.
At this point, you need to decide whether the changes are more important than the pixelation. Most of the time, rasterizing is the better option since it gives you more editing possibilities. Avoiding rasterizing or going through the adjustments in a separate test file is the recommended course of action in the event of a big scale physical print.
Vector Graphics
Illustrators usually rasterize type and shape layers the most, both of whom consist of vector data. Photoshop demonstrates the points, lines, and planes with details curated with algorithms and math – something raster images don’t do.
One may ask, “how to rasterize a screened layer in Photoshop?” But pixel manipulation isn’t necessary for this field since you can make alterations with a click.
This way, you will suffer no image degradation, and printing is simplified regardless of the resolution. Rotate them, scale them and do whatever you want with no fear.
Read Also: Can You Make Vector Images in Photoshop?
Layer Types
A user’s ultimate structure should stay as a vector artwork on its layer until they wish. If you choose a font size and style, rasterize the type, then apply a blur filter. You can’t go back and modify the size and style of the class.
The type must stay in vector form throughout the preliminary layout to ensure clear and crisp changes in font size or style at any setting.
So how to rasterize a text layer in Photoshop?
Once most typographic selections have been made and pixel-level adjustments have been completed, rasterizing type for text is the best option for users.
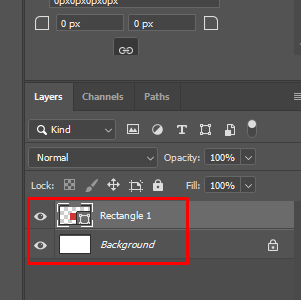
Shape Layers
Photoshop will get you a brand new layer consisting of a fill layer upon creating a unique shape with your assigned tools. The fill layer alongside the foreground shade reflects the user’s image drawing due to its collaboration with a vector mask.
How to rasterize a layer mask in Photoshop?
Photoshop draws shapes in a remarkably different style than Illustrator and other vector applications. Photoshop takes it step by step.
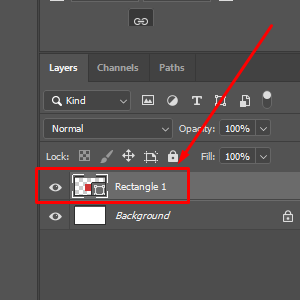
- First, you will get an active layer.
- Over that will go a fill layer.
- There you have it- a vector mask.
So whatever you draw will receive a second layer that will reveal the insides of the layer below.
If you intend on rasterizing shapes, you will need to understand the process.
Rasterizing a Shape Layer
You will get three ways to rasterize a shape layer in Photoshop. And they are:
Layer to Rasterize to Vector Mask
This process turns the vector mask into its ordinary type only to not alter the fill layer option.
Layer to Rasterize to Fill Content
This process doesn’t make changes to the vector mask. Instead, it creates a plain layer with a similar shade out of the fill layer.
Layer to Rasterize to Shape
In this process, only the shape of the vector mask will have any color to it. The process will merge the fill layer with the vector mask to bring an outcome.
What about Smart Objects?
Smart objects allow users to alter a layer while keeping the layer untouched. You will receive the selection to convert a shape to a smart object as you try to apply a filter. Then all you have to do is click on it, and you won’t have to rasterize it first or later.
Why is Layer Rasterizing Important?
Rasterizing layers convert a vector layer to a pixel layer. Designers don’t always look for vector images since the magnified outcome may be unclear. Designers like to get creative, so pixel layers come in handy.
Rasterizing is a must when you will try to create multiple effects over a shape. Without rasterizing, many effects won’t work. If you want to get a developed notion, consider testing the effects before rasterizing.
If, for example, you sketched a form in Photoshop and wanted to apply the ‘blur’ effect to it. However, when you attempt to use this effect on the design you’ve already produced, a dialogue box opens asking you to rasterize the layer. Rasterizing a layer in Photoshop is now a must-do for designers who want the same results.
When Should You Rasterize a Layer in Photoshop?
Each designer has its own unique set of criteria. However, you should be aware of the impact of rasterizing a layer on the image/shape or text that you just placed before and after applying a filter.
Suppose you created a form to your canvas, then applied an effect to it before rasterizing the layer. The effects and the shape you just added would remain independent items in your work, allowing you to alter the results.
Still after rasterizing the layer, if you apply some filters, Photoshop will only use the filters to your text and shapes, not your effects, which can be a nightmare.
Read Also: How to Unmerge Layers in Photoshop?
Conclusion
Rasterizing allows you to convert a vector layer or smart object into the pixel layer in Photoshop. The process is crucial for designers who want to apply multiple effects over a shape.
However, be aware of the impact of rasterizing a layer on the image/shape or text that you just placed before and after applying a filter.
Frequently Asked Questions
Here are some frequently asked questions on how to rasterize a layer in photoshop.
What Does It Mean to Rasterize a Layer in Photoshop?
When you rasterize a layer in Photoshop, you’re essentially converting it from a vector layer into a pixel layer. This is often necessary when working with text or shapes, as it can only apply some filters to pixel layers.
How Do I Rasterize an Image in Photoshop?
To rasterize an image in Photoshop, simply select the layer you want to rasterize and click “Layer” > “Rasterize” > “Image.”
Should I Rasterize Layer in Photoshop?
It depends on what you’re trying to achieve. If you want to apply multiple filters to an image or shape, you’ll need to rasterize the layer first.
How Do You Mask on Photoshop?
There are a few different ways to mask in Photoshop, but the most common is to use the “Quick Selection” tool. Select the area you want to mask and then click “Edit” > “Fill.”
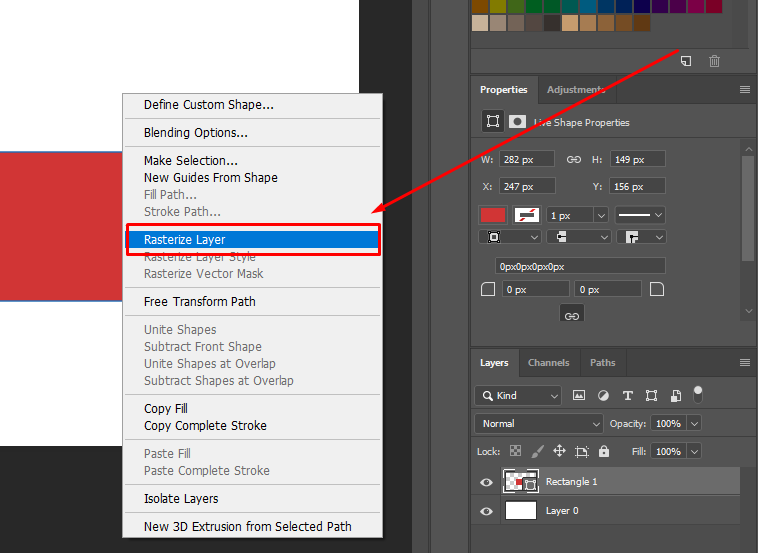
How Do You Rasterize a Smart Object in Photoshop?
Simply pick “Rasterize Layer” from the context menu when you right-click on the layer. You may also rasterize a layer by attempting to alter it (for example, painting on it) and then selecting “OK” to rasterize the smart object when Photoshop complains.


