
Photoshop is designed in such a way that anyone from a beginner to a professional can work with the tools to polish their photos. So, your editing becomes halfway easier if you know which toolkit would be appropriate for what job.
When it comes to cutting out an image or simply cropping a part of it, you will find several tools to execute the task—for example, lasso, eraser, or magic wand. But if you are looking for the most accurate way of cropping an image, you should choose the pen tool.
Some people may find using the pen tool complicated. This article contains a step-by-step guide to help you learn how to use the Photoshop Pen tool to cut out an image. Learn it once, trust the process, and you will love the outcome that’s guaranteed.
What is the Pen Tool In Photoshop?
Contents
Photoshop’s Pen tool is a path builder. It enables us to make precise, detailed choices and cutouts of any image section you choose.
The Pen tool correctly traces an object by placing different anchor points. By clicking and dragging from a new anchor point, we may adjust the curvature of each anchor point.
Because we can define the settings and get as detailed as we like, the Pen tool is the most precise selection tool. It can be a time-consuming procedure, but constructing pathways rapidly becomes second nature.
Why Use Pen Tool?
You may ask why to choose the hard way and pick the process that needs more time and effort. Well, the Pen tool helps you cut out a part of any image precisely and accurately. Images that need detailed editing cannot be done using other tools.
Apart from this, the Pen tool also provides you with the benefits mentioned below:
· Effective Paths:
The pen tool works by using trace paths to find out the shape of an object accurately. With the anchor points and paths, you can edit detailed lines of an image to crop it out, such as hairlines or branches of a tree.
· Re-editing option:
You can readjust the points and lines while using the pen tool, while using the other tools may not allow you to do so.
· Works both in curves and straight lines:
The traditional way of cropping often leaves the background with the part you want to cut out. But pen tools help you cover all the sharp edges to get a perfectly cropped picture.
Find the Pen Tool in Photoshop:
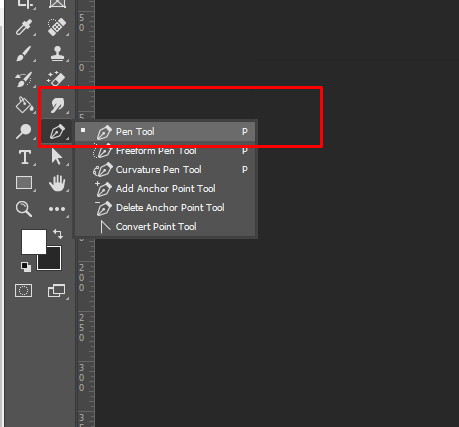
Alright, let’s move on with our cropping process. To begin, you need to enable the Pen tool first. Open Adobe Photoshop and hit the ‘P’ key on the keyboard if you want quick access. The pen tool will be enabled to work.
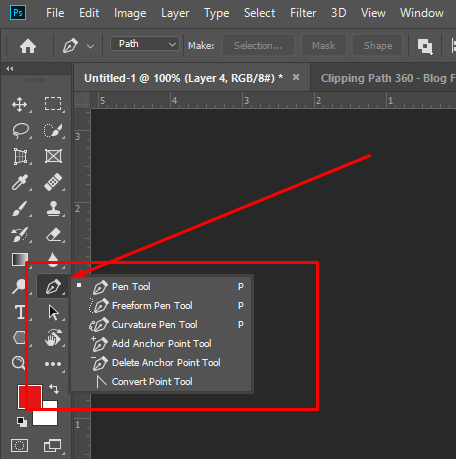
However, you can find the tool from the Main Tool palette on the left side of your screen. You can locate it easily above the Text tool. Clicking on the tool will show you five other features. And below the Text tool, you will find the Direct Selection Tool (white arrow) and Path Selection Tool (Black arrow).
Now, it’s time to start the cropping.
Step-by-Step Guide to Use Pen Tool:
The pen tool might be a little complicated to use for beginners. That’s why following the steps accordingly could be the best approach for you to execute the task.
We have included a step-by-step guide below to make the process easy to understand. It may take a few practice sessions to master the tool’s techniques. So, don’t leave the process in the middle and continue with the steps.
Step 01: Enable the Pen Tool:
Follow the options mentioned above to kick start the tool.
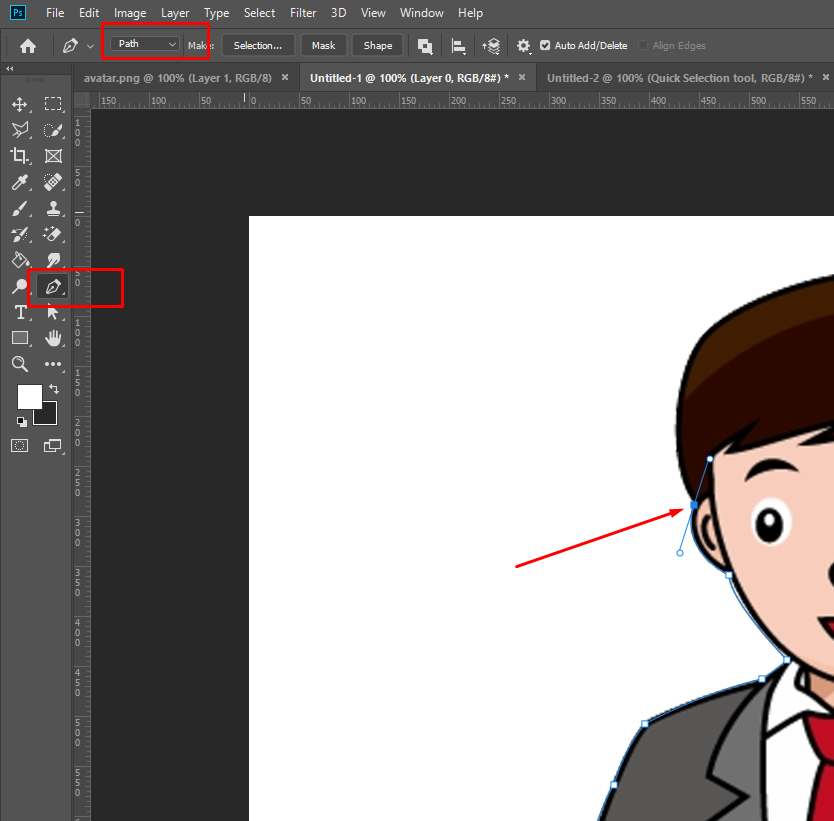
Step 02: Creating paths to select Shapes:
Since the Pen tool works with the anchor points, you need to draw them outside the image you want to crop. Zoom in the image for a better view and click on the White Arrow to select ‘Direct Selection Tool’ to point out the arrows around the portion/person/ object. If you miss any point, click ‘Pen tool’ and + on your keyboard, and the missing point will be added.
Step 03: Selecting from the Path:
Now you need to find out the ‘Path Panel‘ from the right side of the screen. You will see the ‘work path‘ option. Hold down Ctrl and select the option, and the marching ants around the object you selected will be visible to you.
Step 4: Masking the Background:

It is time to remove the background, and we will do that by creating an inverted mask. Press the Alt key, and the mask will cover the outer part of your selected path. Now, press Delete or Backspace to remove the unwanted background.
However, if you want to remove the selected object surrounding your path, pressing the Delete key will do the trick.
Keyboard Shortcuts to Speed Up Cropping
Selecting the options from the toolbars can be bothersome when you need to work quickly. For example, holding the Alt key and clicking on the anchor point make your path selection process faster.
Other than the Alt key, you can use-
- Z + Alt – to Zoom in an image
- Z- to Zoom out of an image
- CMD- to alternate between direct selection tool and pen tool
- Alt- for deleting any control handles
- Space bar- for moving the canvas
Conclusion:
We hope that this guide helped you learn how to use the Pen tool to cut out images. The Pen tool is an excellent addition in the world of Photoshop, where you can edit your photo and crop out any unnecessary scene, background, object and replace them with the suitable one you want.
Although there are other methods to crop an image, the Pen Tool is the most popular for the editors because of its high-quality outcome. You can also try the quick selection tool, which is easy to learn and provides a fine-tuned selection.
Frequently Asked Questions:
Here are some questions that you may have in your mind working with the Pen tool.
How Do I Cut Part of an Image Out in Photoshop?
Photoshop has built-in tools in the software to help you with the editing. To cut out part of an image, you can choose any tool from Quick selection tool, Pen tool, Eraser, or Color Range tool.
What Is the Fastest Way to Cut Out an Image in Photoshop?
The fastest way to cut out an image in Photoshop is the Remove background option. This option is available in the Properties panel>Quick action>Remove background. But if you need more delicate action, use the Pen tool.
How Do I Crop an Image in Photoshop Without Cropping?
You can use the Marquee tool to crop an image without losing the actual quality if you use the cropping tool. Or you can try using the Pen tool to select a specific portion.
How Do You Mask On Photoshop?
Applying a mask on Photoshop is comparatively easy Photoshop. Go to the Layers Panels to select a layer. After that, click ‘Add Layer Mask’, and you will find the white layer mask on the selected layer.


